Managing ML Training Data with DVC and Determined

February 09, 2021
This piece is part of the Determined AI Writers’ Program, which supports members of the ML community writing about their deep learning work with Determined.
In traditional software development, version control tools like Git make it easy to track changes to your code and collaborate with other developers. However, machine learning poses a new set of challenges:
- Versioning the data used in an experiment
- Versioning various machine learning models
- Keeping track of large datasets
- Tracking experiment metadata such as hyperparameters, metrics, and logs
In this article, we look at how Determined and Data Version Control can be used together to address these challenges.
Data Version Control
Project organization is a critical aspect of machine learning because it makes collaboration easier. Data Version Control (DVC) is a machine learning experiment management tool that enables ML engineers to incorporate best practices in their data science workflow. It works well with Git to keep track of various aspects of your project, although it can also be used without Git.
Data Versioning
Git does not manage large data sets well out-of-the-box. That’s where DVC comes in. DVC works by creating a small file with information about the data. This file is small enough to be committed to Git and consequently to a hosted versioning platform such as GitHub. The data files can then be pushed to remote storage such as AWS or Google Drive (We’ll walk through how to do this later). Once the data is pushed to remote you can switch between the datasets the way you would do using git checkout.
Other things that can be done with DVC include:
- Version and download your artifacts (e.g., model checkpoints)
- Build reproducible data pipelines
- Visualize your data pipelines
- Compare model metrics across various experiments
In this article, the focus will be on the data versioning capabilities of DVC. All other model management tasks will be handled by Determined.
Set Up DVC and Determined
Let’s look at how you can get DVC and Determined to work together in the same environment. Let’s start by creating a Python virtual environment (virtualenv) and activating it:
virtualenv env
source env/bin/activate
Check out the code here and follow along.
Installing Determined
In order to use Determined, you need to install the Determined CLI and deploy a Determined Cluster. You will use the CLI to run commands on the terminal. You can install the CLI into the virtualenv using this command:
pip install determined-cli
There are various ways to install Determined. In this case, let’s install it using det-deploy.
pip install determined-deploy
det-deploy automates the process of installing and starting Determined as a series of Docker containers.
Starting a Cluster
Determined can be used in the cloud, with an on-premise cluster, or on your local machine. Let’s see how you can set up Determined on your local machine. First, you should ensure that Docker is installed.
Next, run the command below to install the Determined master and a single Determined agent on the same node. This essentially creates a local cluster on your machine.
det-deploy local cluster-up --no-gpu
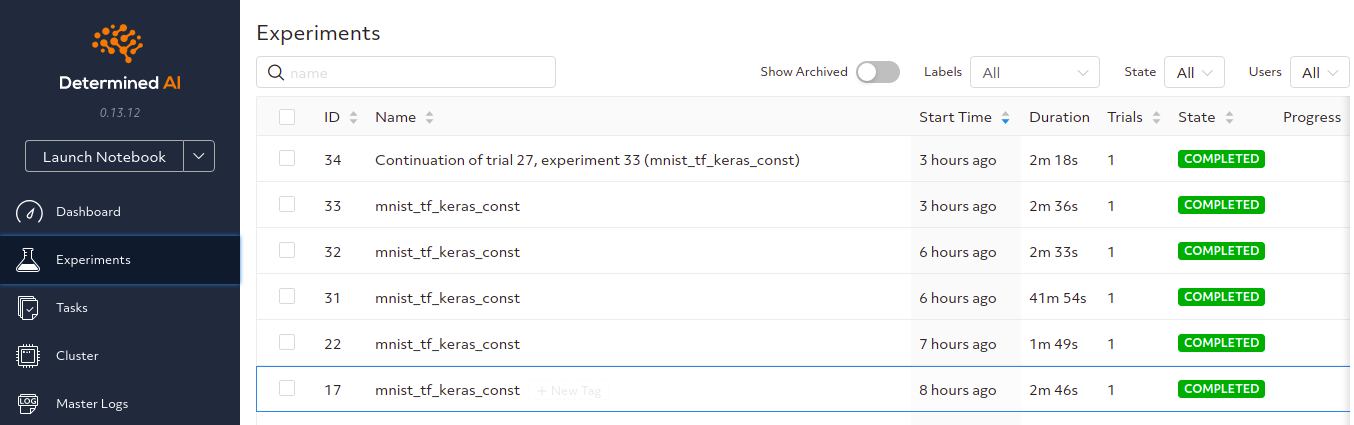
If you have GPUs on your local machine, you can omit --no-gpu from the command above. Once this is done you can navigate to http://localhost:8080 to access Determined’s Web UI. You can log in with the user “determined” and a blank password. Here’s a screenshot of how that would look like after running a couple of successful experiments.
Check out this link to learn how you can start and stop the cluster you have just created.
Installing DVC
DVC can also be installed into your virtualenv using pip.
pip install dvc
After this, head over to the terminal and initialize git and dvc in your current working directory:
git init
dvc init
Organizing the Project
In order to remain focused on the main goal of this article, let’s use the common MNIST dataset. The dataset will be in CSV form. This is how the project should look:

Let’s talk about the purpose of some of the files and folders above:
envis the Python environmentdatais the folder containing the dataset.dvcand.gitwere created after the initialization. They contain the configurations for those two tools.gitignoredeclares paths that should be ignored by Git.dvcignoredeclares paths that should be ignored by DVC.detignorelist files and folders that should be ignored by Determined, for example, the env folder
startup-hook.sh contains commands that will be executed during startup for every container launched by Determined. Startup hooks are a convenient way to customize the container environment where your deep learning code runs, e.g., to install additional dependencies that your model code requires. In this case, the pandas and numpy packages are installed at startup. Add the following to that file:
pip install pandas
pip install numpy
data.py loads the data from the data folder. model_def.py declares and compiles the model – more on that later. const.yaml is a Determined configuration file that describes how to train a single model with a fixed set of hyperparameters, as described below.
Working With DVC
You can then add the data to dvc.
dvc add data/mnist_test.csv data/mnist_train.csv
This will create .dvc files that will have reference to the data folder. You can see the path and the size of the file.
outs:
- md5: 4bf6da40466ff4e535685b6c92978e95
  size: 18273483
  path: mnist_train.csv
In order to commit the above changes with Git, run:
git add data/mnist_train.csv.dvc data/mnist_test.csv.dvc
Note: You need to ensure that the data is not being tracked by Git by adding that instruction in the .gitigore file.
/data/mnist_test.csv
/data/mnist_train.csv
Now let’s look at how you can push this dataset to Google Drive as the remote. For that to work, you will have to install the dvc[gdrive] dependency via pip. Start by creating a folder on Google Drive, and then find the ID of the folder. The ID is the last component of the folder’s URL, for example:

In this case, the ID of the folder is 1uiyio1kN1HvGmEvDr3Jjz2IrQo_3Hisv.
The next step is to configure DVC to use the newly created GDrive folder as the default remote:
dvc remote add --default remote gdrive://1uiyio1kN1HvGmEvDr3Jjz2IrQo_3Hisv
Next use dvc push to push the files to your new remote. Open the link to authenticate with your Google account. Paste the verification code to complete the process.
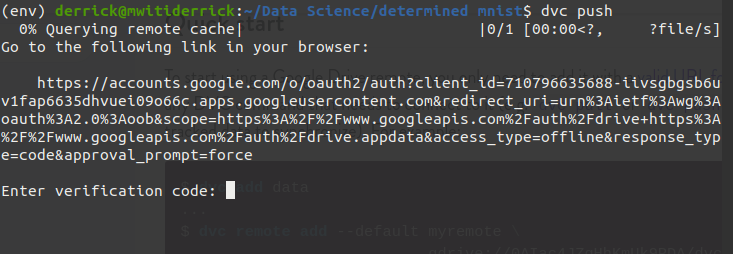
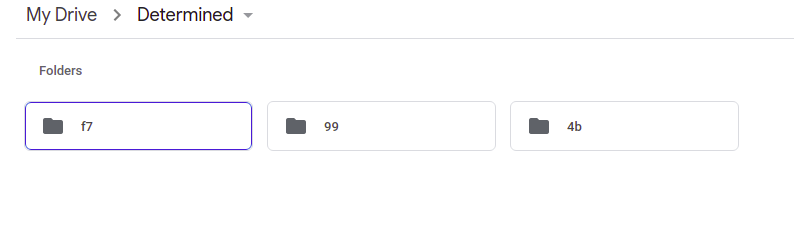
Upon successful authentication, the data will be uploaded to Google Drive: your new remote storage.

The folder names look weird but rest assured that dvc is keeping track of them. After this, you can track the resulting .dvc files using Git.
Other supported storage types are Amazon S3, Azure Blob Storage, Google Cloud Storage, Aliyun OSS, SSH, HDFS, and HTTP.
Let’s now see how you can pull the data you just uploaded to the remote. In order to illustrate that remove the data from the local storage.
rm -rf .dvc/cache
rm -f data/mnist_test.csv
rm -f data/mnist_train.csv
After that, run dvc pull on the terminal. Check the data folder and you will find the downloaded data.
Whenever you make changes to the data, you need to commit the new data in order to track that data version. For example:
dvc add data/mnist_train.csv
Now use Git to track the new changes.
git add data/mnist_train.csv.dvc
After that, you will run git commit and dvc push; in that order.
git commit -m "Dataset updates"
dvc push
At this point, the new file has been pushed to the remote. Assuming you now want to use the previous file, you can do that by checking out to the last commit. You can also do this by checking out another branch if you were using different branches. In this case, let’s checkout to the last commit. After that, you will use dvc checkout to checkout to the previous data version.
git checkout HEAD^1 data/mnist_train.csv.dvc
dvc checkout
After that, you can commit the new changes.
git commit data/mnist_train.csv.dvc -m "Using previous data"
Since the files have already been saved before, you don’t need to push them again.
If you have added your remote Git URL, you can view all the folders and files by using dvc list.
dvc list https://github.com/mwitiderrick/Determined-DVC
Now that you know how to track and version your data using DVC, let’s use that data to build a simple deep learning model. Since the data versioning problem is solved, let’s see how we can solve the other challenges by using Determined.
Build the Model Using Determined
Let’s kick off with the data.py file. This file will load the dataset and return it as numpy arrays. The file contains two functions:
- One loads the training set
- The other loads the validation set
You may have noticed that Determined experiments have a file limit of 96MB for your project. In the real world, your dataset will most likely exceed this limit. Since this project is also using DVC, you can read the dataset from the remote that you set earlier. Since Google Drive was used in this case, you will be required to enter an authorization code before you can read from Google Drive. However, in a production environment, you are unlikely to use Google Drive. Something like AWS will suffice in that case. Be that as it may, let’s see how you can use DVC to read files from your remote storage.
import tensorflow
import pandas as pd
import numpy as np
import dvc.api
import io

def load_training_data():
    train =  dvc.api.read(
        'data/mnist_train.csv',
      repo='https://github.com/mwitiderrick/-Integrate-Data-Version-Control-to-your-Determined-AI-Work-Flow'
        )
    train_string = io.StringIO(train)
    df = pd.read_csv(train_string, sep=",")
    x_train = df.drop("label",axis=1)
    x_train = x_train.values
    y_train = df["label"].values
    return x_train, y_train
The next file is model_def.py, which contains the model definition. In this file a class that extends the determined.keras.TFKerasTrial is declared. The class contains three key methods:
build_modelthat defines the model definitionbuild_training_data_loaderthat processes and returns the training setbuild_validation_data_loaderfor processing and loading the validation set
Create a class called MNISTTrial. Now define a constructor for the class.
def __init__(self, context: TFKerasTrialContext):
        self.context = context
Next, define the build_model method. This will return a compiled Keras model. There are only a couple of changes when you compare this with the normal Keras model definition:
- The model has to be wrapped by using
self.context.wrap_model() - The optimizer needs to be wrapped with
self.context.wrap_optimizer()before the model is compiled self.context.get_hparam("dense1")means that this value is a hyperparameter that is defined in our experiment configuration file. Determined allows users to choose their hyperparameters freely — that is, any value that you think might influence model performance can be made into a hyperparameter and then subsequently optimized.
We’ll talk more about experiment configuration in a little bit.
def build_model(self):
        model = keras.Sequential(
            [
                keras.layers.Flatten(input_shape=(28, 28,1)),
                keras.layers.Dense(self.context.get_hparam("dense1"), activation="relu"),
                keras.layers.Dense(10),
            ]
        )

        # Wrap the model.
        model = self.context.wrap_model(model)

        # Create and wrap the optimizer.
        optimizer = tf.keras.optimizers.Adam()
        optimizer = self.context.wrap_optimizer(optimizer)

        model.compile(
            optimizer=optimizer,
            loss=tf.keras.losses.SparseCategoricalCrossentropy(from_logits=True),
            metrics=[tf.keras.metrics.SparseCategoricalAccuracy(name="accuracy")],
        )
        return model
The next two methods load the training and validation data.
def build_training_data_loader(self):
        train_images, train_labels = data.load_training_data()
        train_images = train_images / 255.0

        return train_images, train_labels

    def build_validation_data_loader(self):
        test_images, test_labels = data.load_validation_data()
        test_images = test_images / 255.0

        return test_images, test_labels
Training A Model Using the Determined CLI
At this point, you can use Determined to train the model and do a hyperparameter search. For that, we need to perform a trial, which is basically a training task. One or more trials form an experiment. Before running an experiment, a configuration file for that experiment is needed. Some of the items declared in this file include:
- An optional human-readable description for the experiment
- Model hyperparameters: fixed values (constants) when training a single model, or ranges of legal values when performing a hyperparameter search
entrypoint, i.e the name of the trial class to use- The
searcherdeclares how hyperparameter tuning will be done. In this case, we are training a single model with a fixed set of hyperparameters, so we use the single searcher and train the model for 5 epochs worth of training data. - The container environment where our model code will run. In this case, our model requires TensorFlow 2 but Determined uses TensorFlow 1.15, so we can specify a TensorFlow 2 container image instead.
This information is defined in a .yaml file, as shown below:
environment:
  image:
    cpu: "determinedai/environments:py-3.6.9-pytorch-1.4-tf-2.2-cpu-0.8.0"
description: mnist_tf_keras_const
hyperparameters:
  global_batch_size: 32
  dense1: 128
records_per_epoch: 60000
searcher:
  name: const
  metric: val_accuracy
  smaller_is_better: false
  max_length:
    epochs: 5
entrypoint: model_def:MNISTTrial
The next step is to run the experiment using the Determined CLI. const.yaml contains the configuration while the ‘’.’’ means that the experiment files are located in the current working directory.
det experiment create const.yaml .
After this, you can check progress on the Determined Web UI by navigating to http://localhost:8080. Determined will do the model validation automatically. All this information can be seen on the Web UI.

In the “Summary” section you can see information like your models’ best validation metrics.
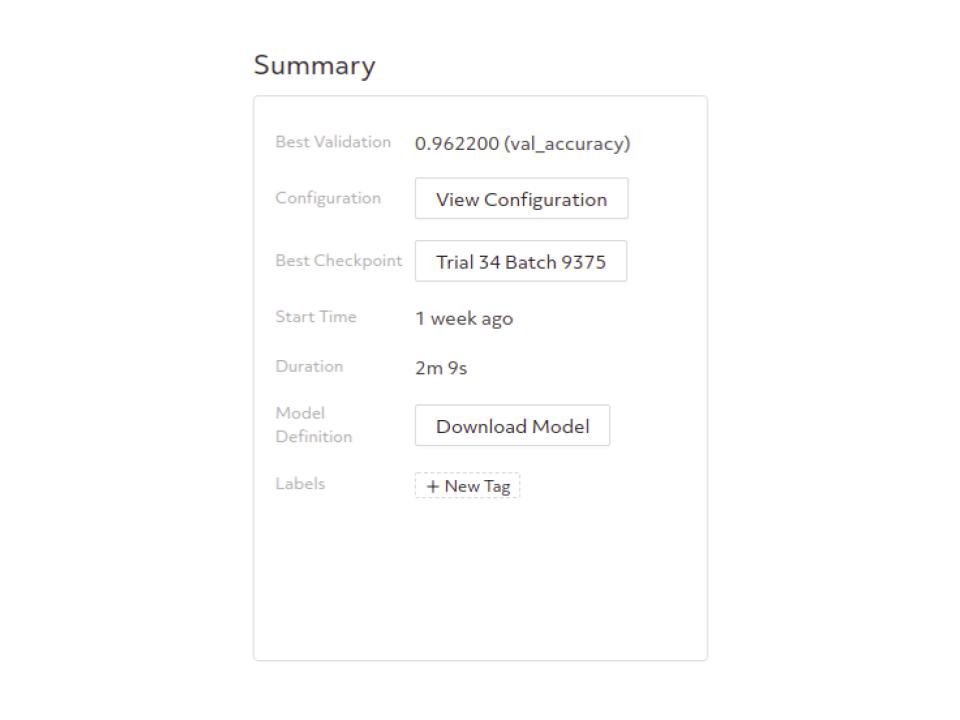
You can even access the best model checkpoint.

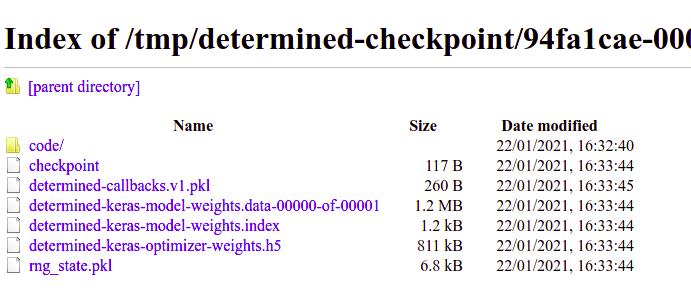
Going to the provided location gives you access to the model’s pickle file as well as the weights.
Determined also provides APIs to make it easy to perform inference using a previously trained model, as well as a built-in model registry to keep track of your trained models. For more, check out Using Determined’s Model Registry To Simplify Model Deployment.
Note: You can always make amendments to your model and run more experiments. These experiments will be available on the Determined Web UI for you to compare.
Alternative Approach
In this article, you have seen that you can use DVC in Python to fetch data from your remote storage. An alternative approach is to run DVC in your startup hook and download the data from the remote storage into your container. Since this is a container, ensure that you are using a remote that doesn’t require a token to validate. The commands in the startup hook below will install the required packages and then initialize Git and DVC. The first line in the startup hook removes the ruamel package which seems to conflict with DVC. During the installation process it will be installed again with the version required by DVC. The final command, dvc pull, downloads the data into our container.
rm -rf /opt/conda/lib/python3.6/site-packages/ruamel*
pip install pandas
pip install numpy
pip install dvc
git init
dvc init
dvc remote add --default remote link_to_your_remote
dvc pull
Conclusion
In this article, you have seen how you can use DVC for version control coupled with Determined to manage other aspects of your project. Specifically, you have seen how to:
- Version your data using DVC
- Push the data to local storage
- Switch between various versions of the data
- Loading large data files from the remote storage
- Port a Keras model to the Determined API
- Configure Determined experiments
- Run the experiments
- View the experiment results on Determined Web UI
Just to mention a few! You are now set to start integrating DVC into your Determined workflow.
See Also
- For another example of how to use DVC and Determined together, check out this example from the works-with-determined GitHub repo
- For another example of how to use Determined with other leading MLOps tools, check out End-to-End Deep Learning with Spark, Determined, and Delta Lake