SEP 11, 2024
Intro to Core API: Part 1 (Integer Incrementing)

November 28, 2022
So you want to learn how to use Core API – you’ve come to the right place! This blog post walks you through a simple example showing you how to port your script to the Determined platform. This post is based on a Lunch and Learn where we discussed the philosophy behind Core API and covered the same tutorial covered in this blog post. If you prefer video tutorials, feel free to watch that instead! We also include timestamps throughout this post so you can watch specific sections for elaboration.
If you are not familiar with Determined yet, we recommend reading Intro to Determined first. This will cover core concepts and installation.
All the files you’ll need for this tutorial are located here.
Why Core API?
First, some philosophy behind the design of CoreAPI (feel free to skip this if you’re just interested in the tutorial). This is also discussed at Recording Timestamp: 00:01:35.
Determined originally offered state-of-the-art hyperparameter search based on the Hyperband algorithm as its distinguishing feature. This technique involved preemption, which allowed it to stop poorly performing trials early and thereby save compute resources. In order for Determined to easily control the training loop and perform hyperparameter search, our original Trial APIs required users to plug their code into a template (e.g., a PyTorchTrial or KerasTrial subclass) in order to configure their model code within Determined’s training loop. This allowed Determined to run the training loop behind the scenes, but took away user control over their training loop. However, reconfiguring a complex training loop to fit within the Trial API mold is challenging. Additionally, users often wanted to use only a subset of Determined features such as distributed computing, experiment visualization and tracking, and checkpointing, rather than hyperparameter search. Thus, CoreAPI was born, allowing the Determined platform to be separated from the Determined training loop, thereby giving users the freedom to write their own training loops and have complete control over what gets reported to the Determined master (e.g. metrics, checkpoints). This was a complete architecture reversal, allowing users a much better experience.
Integer Incrementing Tutorial
Let’s get started with the tutorial!
Step 1: Running a script on Determined
To use CoreAPI, you’ll need 2 things:
1) your training script, and
2) a config file.
The script we’ll use is 0_start.py and the config will be 0_start.yaml.
In this tutorial, instead of doing any actual model training, we’ll just use a “fake” model training script to illustrate the relevant features of Core API as simply as possible. 0_start.py increments an integer in a loop as shown below:
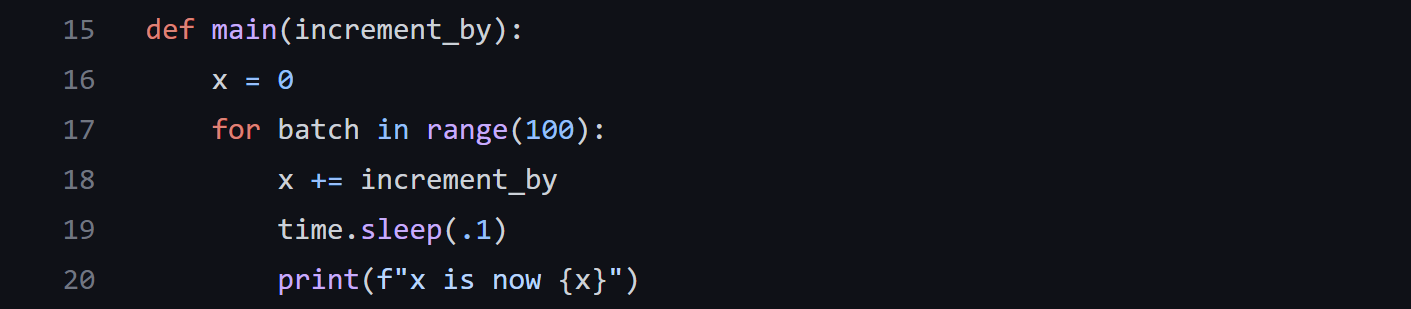
sleep() is added in so that the script doesn’t run instantaneously.
In order to run this on your local Determined master node, you need a few basic things in a config file:
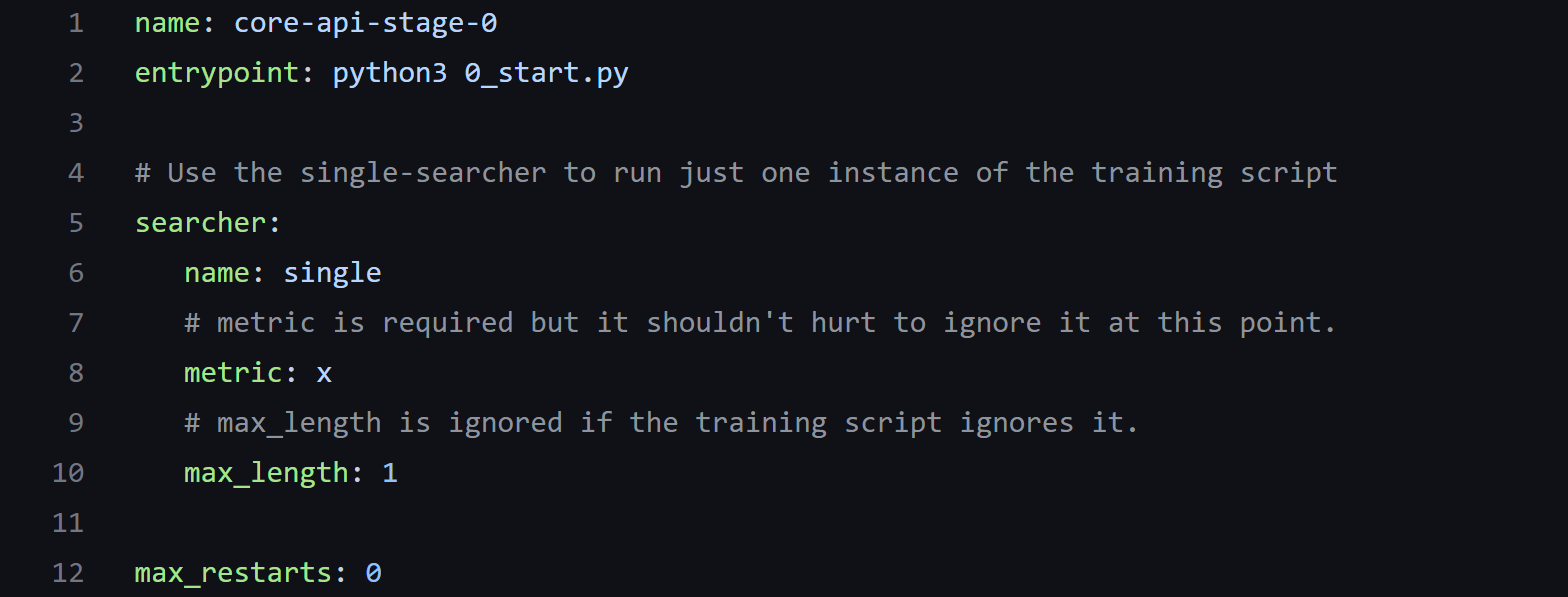
0_start.yaml
name: The name of your experiment.
entrypoint: The execution command for your experiment, e.g., python3 0_start.py. Include command line arguments here if you have any.
searcher: Searcher for hyperparameter search settings, required for all experiments.
-
name: set to single searcher for running only one trial. A list of full search methods can be found here. -
metric:The metric name that corresponds to the metric we want to report to Determined master. Useful for getting top trials based on a metric, like trial with best validation loss. -
max_length: Maximum training length of an experiment. Can optionally be expressed in any of training units specified here.
max_restarts: The number of times you want to restart a trial if it fails. Useful in production, but not for this example since we are not doing any model training.
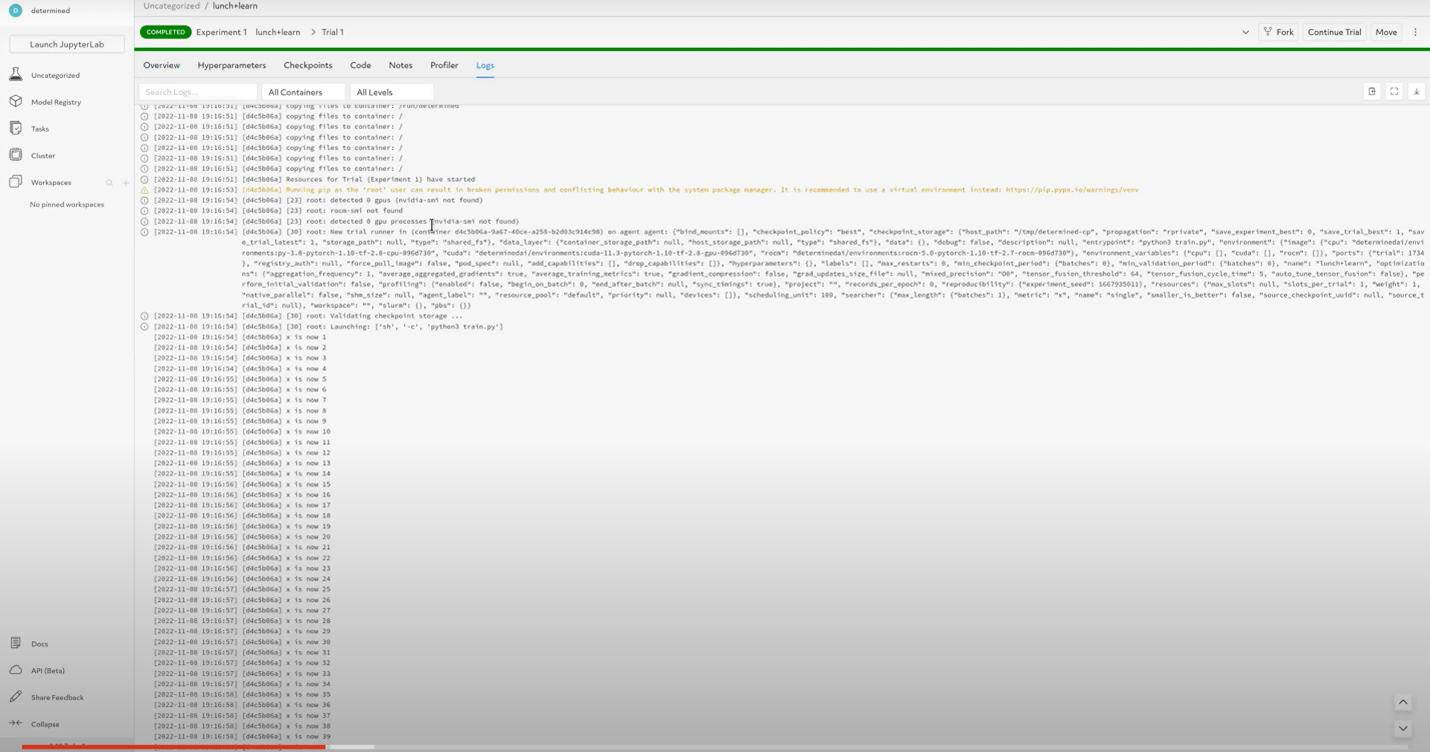
Run the experiment in the WebUI using the command:
det e create 0_start.yaml . -f
You should be able to see the logs in the WebUI, under your experiment, in the logs tab:
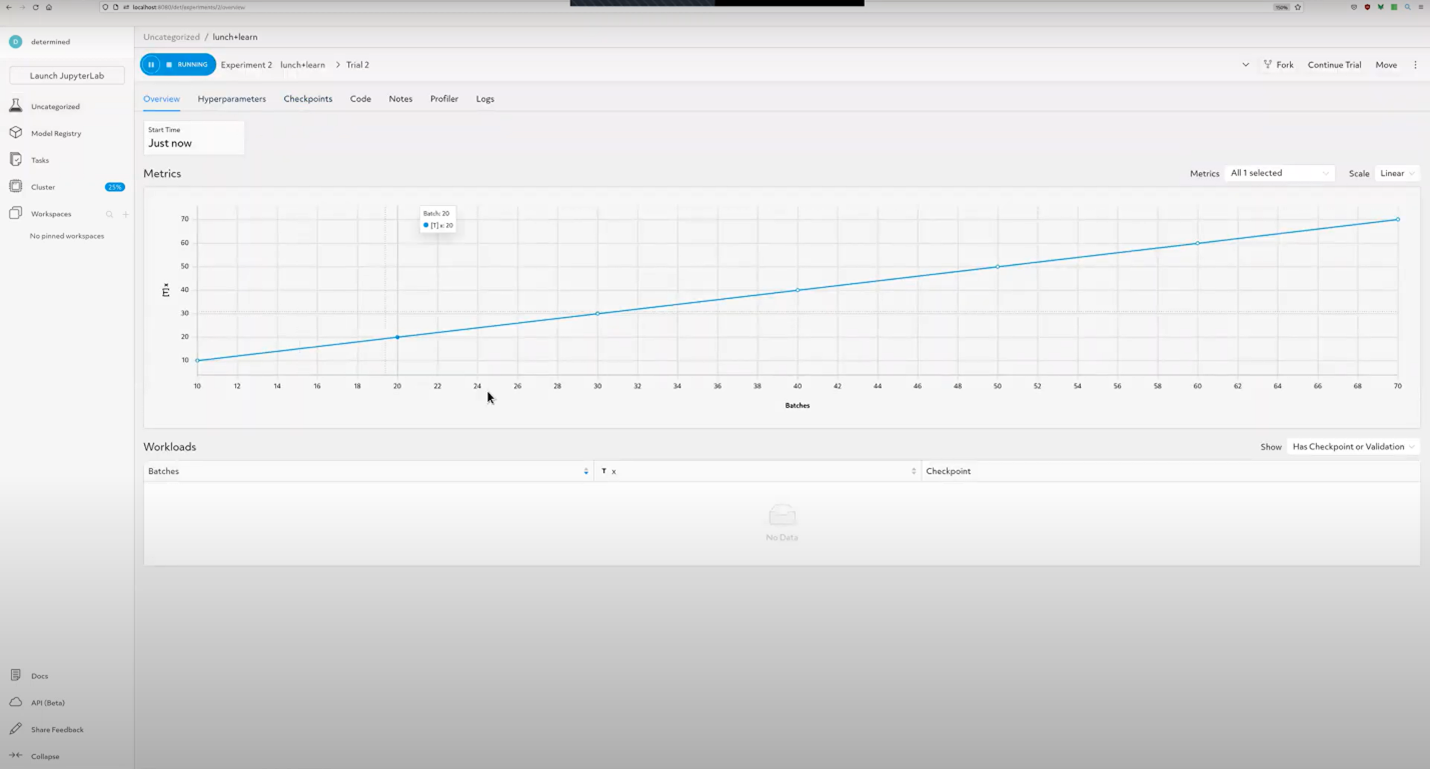
If you click on the Overview tab, you’ll notice that the Metrics chart is blank since we didn’t report any yet:
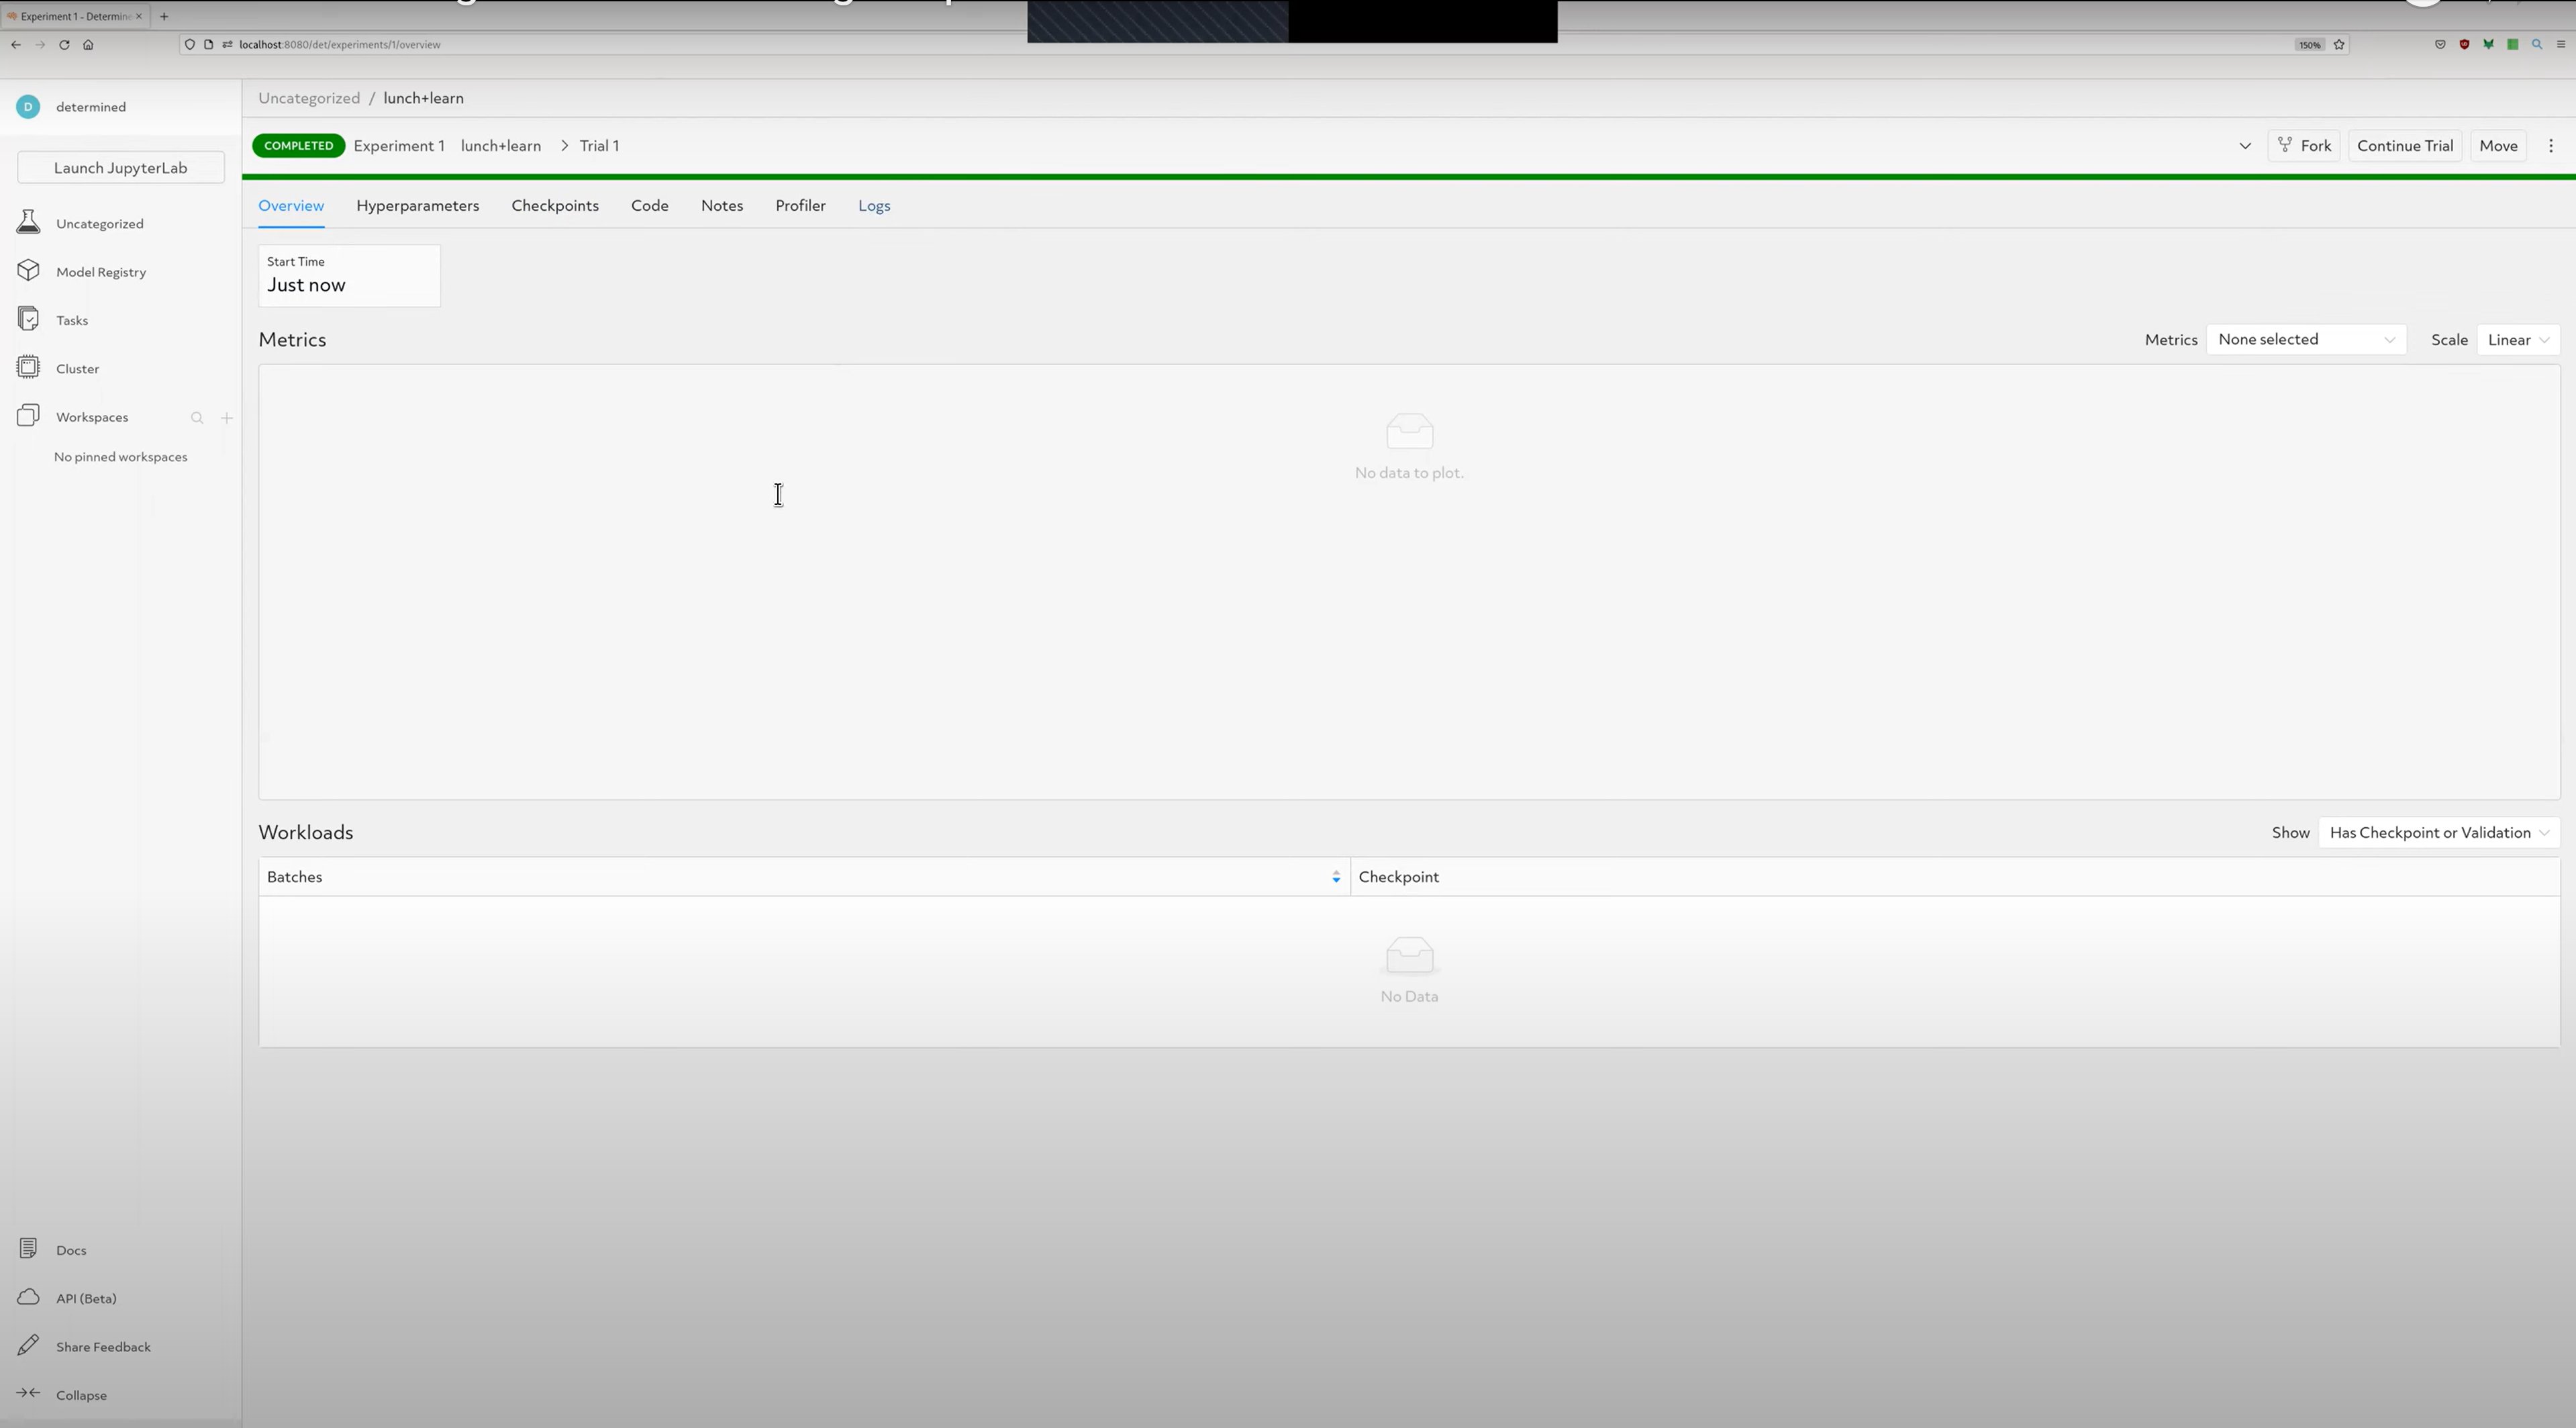
This is where we’ll actually start using the Core API.
Step 2: Metric Reporting
In this step we’ll be referring to the script 1_metrics.py, which builds upon 0_start.py by adding metric tracking.
First, we need to import Determined:

1_metrics.py
And then we need to create a determined.core.Context, which is the gateway to all Core API features:

1_metrics.py
This core context has to be passed into the main function since we refer to it inside the main function:

1_metrics.py
A steps_completed variable is created to pass to metric reporting functions as the x-axis of our metrics graph:

1_metrics.py
Then, reporting training and validation metrics becomes easy:

1_metrics.py. Training metrics are reported every 10 steps to reduce network overhead when reporting metrics.
Run the new experiment via
det e create 1_metrics.yaml . -f
The WebUI should now look like this under the Overview tab under your experiment:
If you would like to enable python default logging, you can import the python logging library: Recording Timestamp: 00:24:36
And add the following statement, which enables built-in logging from libraries you are using (in our case, from the Determined library):

1_metrics.py.
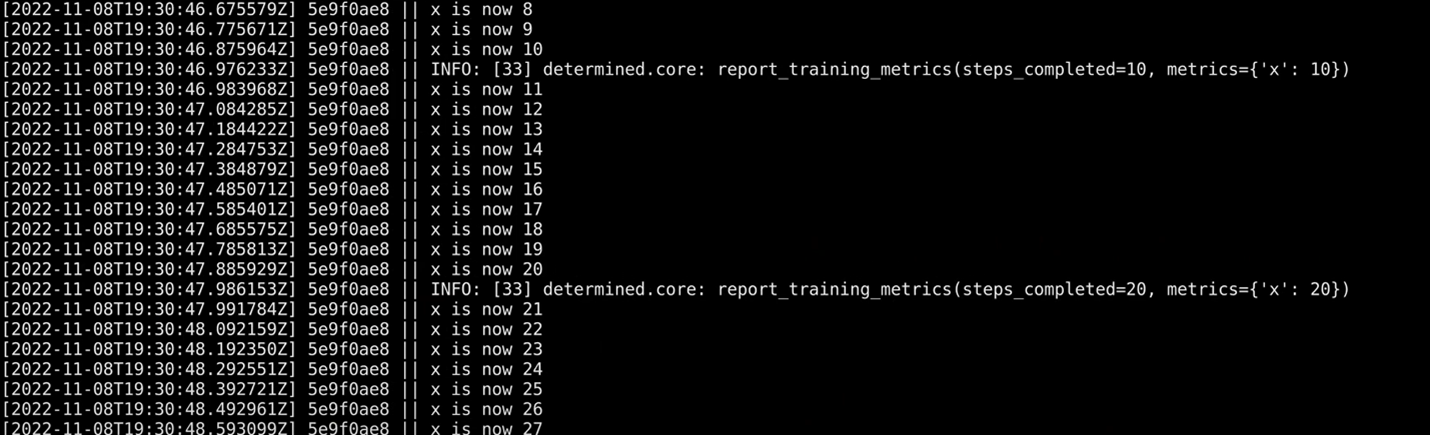
which will trigger print statements at the specified log level in your terminal output, shown below:
The next step we’ll cover here is model checkpointing.
Step 3: Checkpointing
In this step we’ll be working with 2_checkpoints.py, which builds upon 1_metrics.py by adding checkpointing.
A common question at this stage is: What format does Core API store checkpoints in? The answer is: You decide. Core API regards checkpoints as a bundle of files. To report checkpoints through Core API, we can define our own checkpointing logic and file format however we want. For example, you can define a checkpoint as a file with some data, the number of steps completed, and a trial ID:

2_checkpoints.py. Since the Lunch & Learn was a live coding session, the checkpointing logic and file format is slightly different.
We should also define a function to load a saved checkpoint in case we want to resume training from previously saved weights and use it in the main function as shown here:

2_checkpoints.py.
Then the checkpoint can be saved during training as follows:

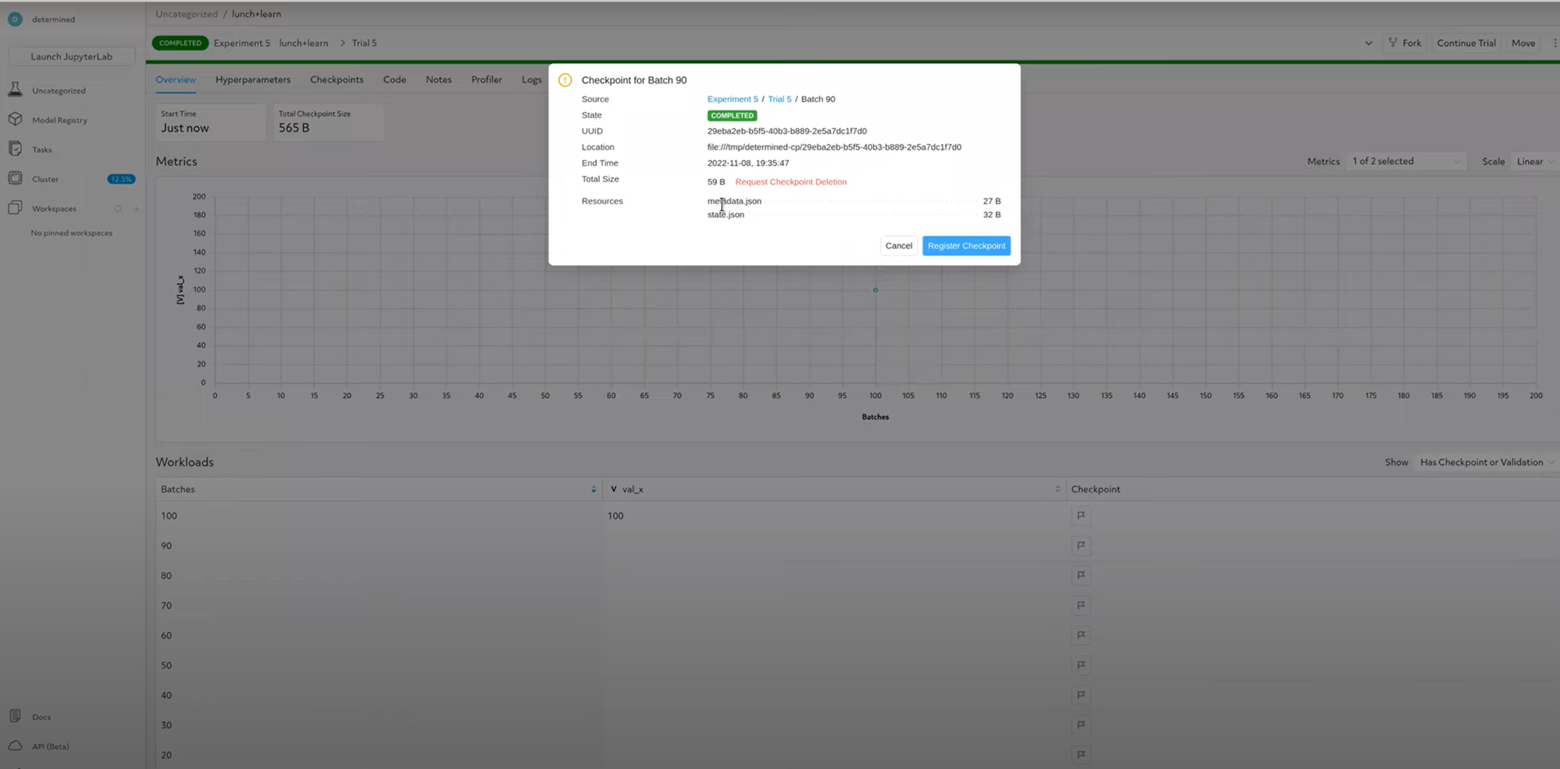
2_checkpoints.py.
To see what saving checkpoints looks like in the WebUI, check out the recording at 00:30:36. Also, to watch a live walkthrough of the exact checkpointing logic written to result in the screenshot below, watch from 00:26:00 onwards.
If you find this post useful, another great CoreAPI tutorial is this one, which walks you through porting a real-world research script to the platform.
Core API is just one example of how of your ideas and suggestions have shaped what we build. We value your input, and want to know how we can help you succeed. We hope to engage with you and hear your feedback. Join our Community Slack channel to reach out and to stay up to date on future Office Hours and Lunch & Learns.
The next post in our Core API series will involve a real model training example using Core API. Stay tuned!