SEP 11, 2024
Personalizing Stable Diffusion with Determined

October 31, 2022
Stable Diffusion is the latest deep learning model to generate brilliant, eye-catching art based on simple input text. Built upon the ideas behind models such as DALL·E 2, Imagen, and LDM, Stable Diffusion is the first architecture in this class which is small enough to run on typical consumer-grade GPUs. In this blog post, we will:
- Explain the basic inner-workings of diffusion models.
- Discuss how to include new concepts into these models via Textual Inversion.
- Demonstrate how to easily run and fine-tune Stable Diffusion using Determined’s Core API with 🤗 Hugging Face’s 🧨 Diffusers and 🚀 Accelerate libraries.
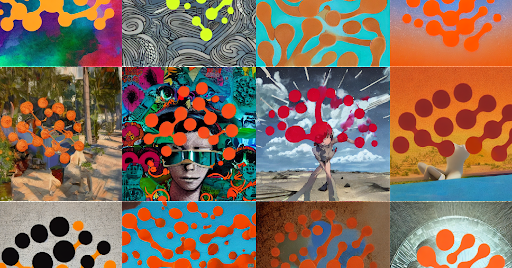
Throughout the post we will also highlight various images created using the Determined AI Textual Inversion example repo, which implements the workflow described in detail below.
Diffusion, Textual Inversion, and 🧨 Diffusers
All diffusion models are trained with a single goal in mind: given a noisy image, attempt to remove the noise. More precisely, the training loop consists of two separate processes:
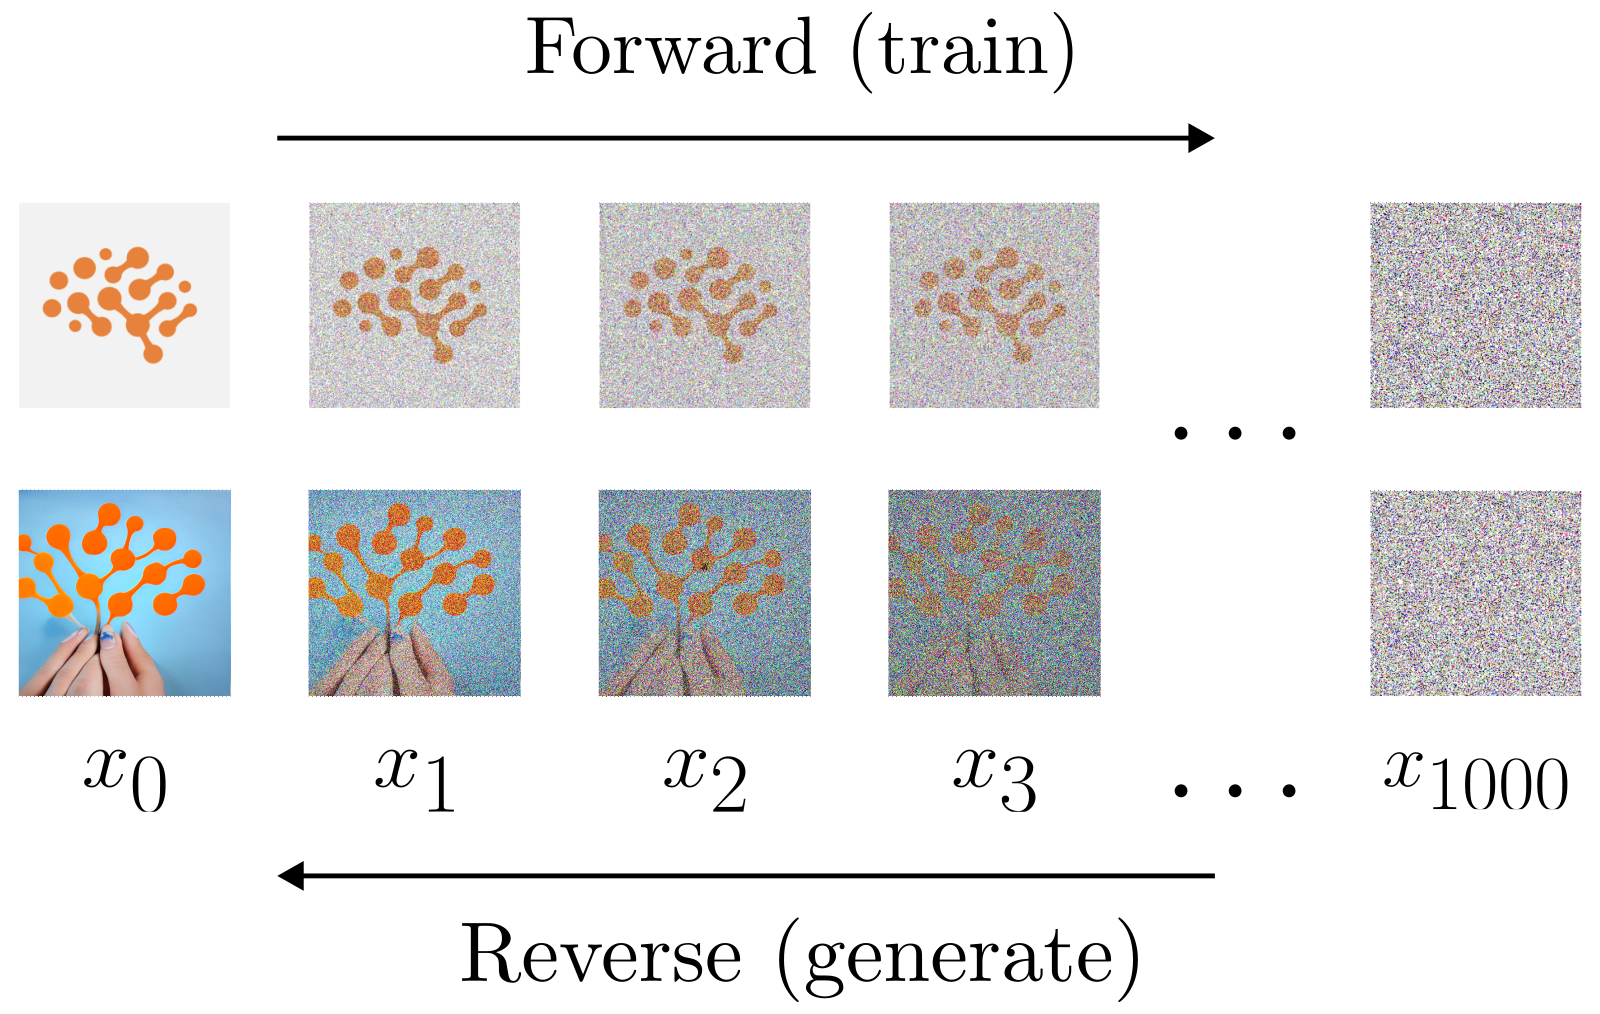
- The Forward Process: Noise is repeatedly added to an initial image according to a fixed schedule, with each such time-step in this process representing one training image.
- The Reverse Process: A neural network consumes a noisy training image and learns to predict which components represent the most-recently-added noise.
Sufficiently trained, such models are capable of creating recognizable, wholly computer-generated images by iteratively de-noising a white-noise seed. A sketch of this process is demonstrated in the figure below. In practice, one typically uses 1000 steps in the forward process, while various methods are used to drastically reduce the number needed for the reverse process; see the DDIM paper, for instance. For a code-based introduction to the fundamental diffusion-model training loop see The Annotated Diffusion Model, also by 🤗 Hugging Face.
Early diffusion models generated images which were representative of the training set’s image distribution. This meant that if, for instance, the training set consisted of dog and cat images, then one would have no control over whether a dog or cat would be produced in the next batch. More recent architectures (such as Stable Diffusion) additionally consume a text description of the image, and such prompts are the user’s main handle for guiding model output.
The prompt vocabulary is fixed at training time and its static nature can be very limiting when a specific output is desired. However, an exciting, recent technique known as Textual Inversion demonstrated that one can add new concepts to the vocabulary, and then fine-tune them to correspond to very particular objects, as defined through additional images.

As an example, consider the Determined AI logo above. If we wanted to use Stable Diffusion to generate a watercolor painting featuring this particular logo, we might use something like:
prompt = "a watercolor painting on textured paper of a brain logo, sharp lines, connected circles, concept art using soft strokes, pastel colors, incredible composition, masterpiece"
💡TIP: Long, descriptive prompts often generate better results.
However, it would be difficult to get exactly what we want, due to the imprecision of language. Instead, using Textual Inversion we can provide a set of images featuring our desired logo, add an entirely new concept into the vocabulary, and fine-tune on the images until their essence is distilled into the new concept.
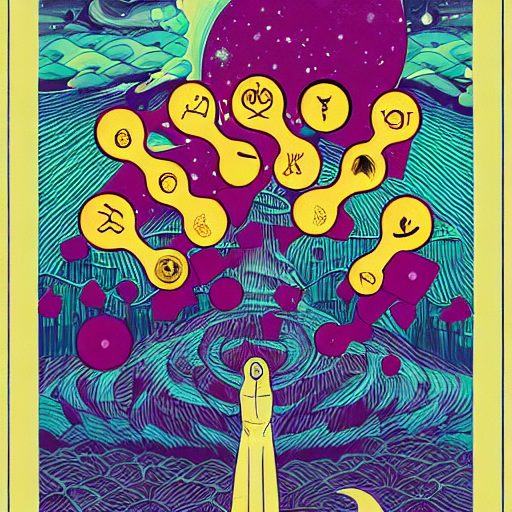
As a concrete example, we will take det-logo to represent the Determined AI logo and initialize this token as being equivalent to the series of tokens brain logo, sharp lines, connected circles, concept art and then fine-tune the embedding-vector representation of this series until it sufficiently captures the essence of the logo. A comparison between the typical output for the above prompt using vanilla Stable Diffusion versus the output after using Textual Inversion can be found below, as well as a time-lapse of the early stages in the Textual Inversion training process.
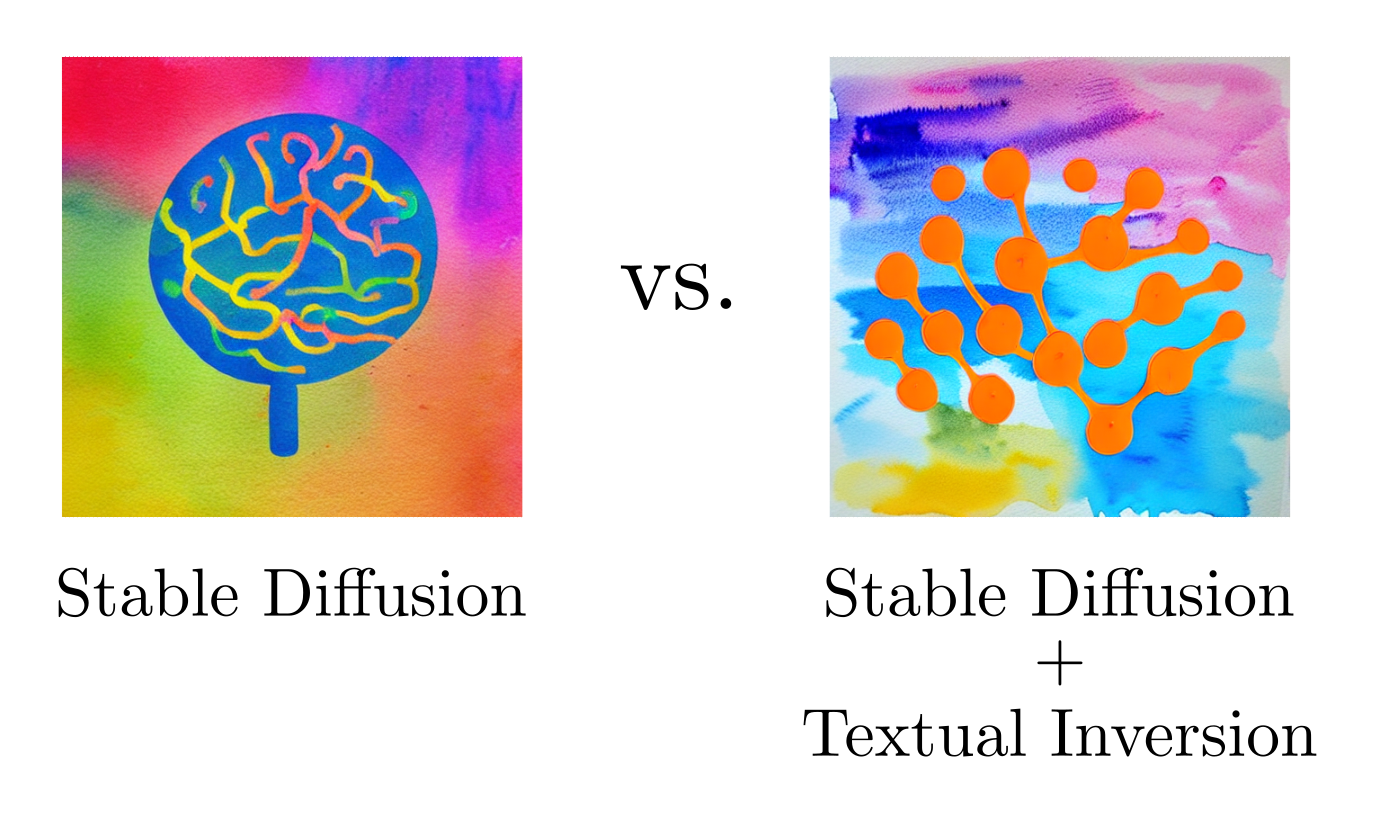
"a watercolor painting on ..." prompt when using Stable Diffusion out of the box. Right: a typical result after replacing the "brain logo, sharp lines, connected circles, concept art" sub-phrase with learned embeddings via Textual Inversion.

"a watercolor painting on ..." prompt during the early stages of Textual Inversion training, as seen at varying numbers of gradient descent steps.
This Textual Inversion procedure is a featured example in the popular 🤗 Hugging Face’s 🧨 Diffusers library which provides an excellent entry-point into the world of diffusion models through a simple API. Below, we will demonstrate how Determined AI makes it easy to fine-tune Stable Diffusion and generate personalized art using the results at scale, utilizing distributed resources to boost the speed and quality of results relative to those attainable through notebook-based workflows.
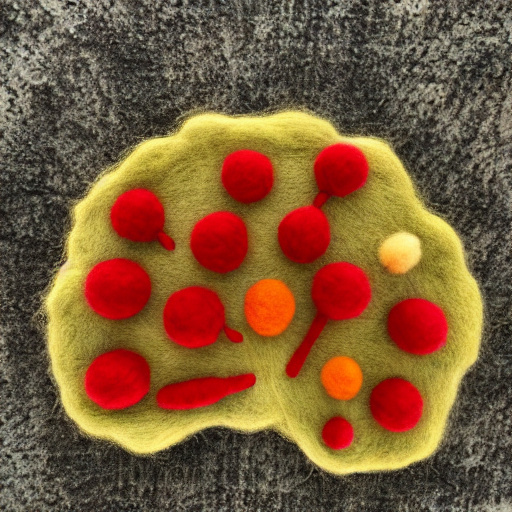
guidance_scale = 7.954906133715842, num_inference_steps = 41, seed = 375130309
Interactive Demo
Before walking through the Textual Inversion process, let us first see what a well-tuned model can do.
Using the interactive 🤗 Spaces
demo below (built on top of gradio), one can generate art featuring the Determined AI logo by either choosing
one of the example prompts or entering a custom prompt which includes the
phrase det-logo. This demo, which is generously supported by a community GPU grant from 🤗 Hugging Face,
uses weights which resulted from a hyperparameter search across many multi-GPU Trials, an easy-to-implement process with Determined AI.
Give it a try! And feel free to share any interesting images with us @GGDeterminedAI.
💡TIP: Play around with the advanced settings. For instance, lowering the guidance_scale will reduce the influence of the prompt on the output.
Walkthrough: Fine-Tuning
Using our example code here, fine-tuning via Textual Inversion takes three steps:
- Create a 🤗 Hugging Face User Access Token (after making an account, if necessary) and accept the Stable Diffusion license by clicking on Access repository at this link.
- Place the desired training images in a new directory in the root of the above repo.
- Change the below fields in the
finetune_const.yamlconfig file, as needed.
environment:
   environment_variables:
    - HF_AUTH_TOKEN=YOUR_HF_AUTH_TOKEN_HERE
hyperparameters:
   concepts:
      learnable_properties:
          - object
      concept_strs:
          - det-logo
      initializer_strs:
          - brain logo, sharp lines, connected circles, concept art
      img_dirs:
          - det_logos
An explanation of the various entries:
YOUR_HF_AUTH_TOKEN_HERE: should be replaced by the User Access Token referenced in step 1.learnable_properties: eitherobjectorstyle, depending on whether we wish to capture the object itself, or only its style.concept_strs: the string we will use when referring to our new concept in prompts.initializer_strs: a short phrase which roughly describes the concept of interest and which provides a warm-start for fine-tuning.img_dirs: the directory in which our training images are stored.
We can fine-tune more than one concept at a time by simply appending the relevant information to each of the lists above.
The fine-tuning Experiment can be submitted like usual by navigating to the root of the repo and executing det e create finetune_const.yaml . via the command line (if you are new to Determined, see the Quickstart guide here). For an even simpler experience, only change the HF_AUTH_TOKEN field in the config and submit the Experiment without further changes; a ready-to-go fine-tuning Experiment using the Determined AI logo is set up in the repo by default.
The Experiment progresses with the features you would expect from Determined AI:
- Easily distribute the Experiment across any number of GPUs.
- Track the fine-tuning progression in real-time through live metrics in the Web UI.
- Pause and resume the Experiment at any time.
- Continue training from a saved checkpoint, tweaking hyperparameters as desired.
- Visualize the process by inspecting generated samples in Tensorboard.
🤗Hugging Face’s 🚀 Accelerate library is used to handle various aspects of distributed training, such as ensuring that tensors are placed on the correct device. In the generation code discussed in the next section, we alternatively use Core API to handle many of the same tasks.

guidance_scale = 10.216345976606725, num_inference_steps = 59, seed = 397055922
Walkthrough: Generation
Once the fine-tuning Experiment completes, it is time to generate art with our newly-trained concept. There are two available methods: via Jupyter notebook or large-scale generation through a Determined Experiment. The former workflow is useful for quick and interactive experimentation, while the latter is useful for pure performance.
We start with the notebook workflow, which again only requires three steps:
- Copy the User Access Token into the
detsd-notebook.yamlconfig file, similarly to the above. - Get the
uuidof the desired Checkpoint by navigating to the Experiment page in the Web UI and either clicking on the Checkpoint’s flag icon or inspecting the Checkpoints tab. - Launch the
textual_inversion.ipynbnotebook on the master and copy theuuidstring into theuuidslist in the appropriate cell.
Step 3 can be performed by executing the following command in the root of the repo:
det notebook start --config-file detsd-notebook.yaml --context .
The --context . argument loads the full contents of the repo into the JupyterLab instance, including the textual_inversion.ipynb repo itself and various supporting files. In particular, these include a demo concept stored in learned_embeddings_dict_demo.pt which was extensively trained on Determined AI logos and which can be used in lieu of (or in addition to) one specified by uuid.
After the above preparation, the textual_inversion.ipynb notebook can be run from top to bottom. Generated images will appear at the end of the notebook.
Finally, after promising prompts and parameter settings have been found via the notebook, images can be generated at scale by submitting a full-fledged Experiment. The generate_grid.yaml file loads in pretrained concepts by uuid or local path and controls the generation process by specifying the prompts and parameter settings to scan over. All generated images are logged to Tensorboard for easy access, as seen in the gif above. By default, simply executing det e create generate_grid.yaml . after inserting your authorization token (but without making any further changes) will submit a two-GPU Experiment which creates nearly 500 total images using the pre-trained demo-concept included in the learned_embeddings_dict_demo.pt file.
Rather than using 🚀 Accelerate to handle the distributed aspects of the computation as in the fine-tuning code, the generation code uses Determined’s Core API to perform these tasks, such as cross-worker communication. Different tools are used in different parts the repo purely for demonstration purposes.
guidance_scale = 10.269008415138138, num_inference_steps = 54, seed = 32024733
Training-Loop Code
So, what exactly is the Textual Inversion training-loop doing?
Here, we answer this question by inspecting a sketch of the fine-tuning code, whose essential elements use 🧨 Diffusers for easy access to diffusion architectures. 🧨 Diffusers integrates seamlessly with Determined through Core API, which adds powerful checkpointing, metric tracking, hyperparameter search, and more.
Before reading the detailed description that follows, it may be helpful to see the digrammatic summary of the Textual Inversion training loop below. In a nutshell, an image (img_tensor) and a prompt which both describes the image and contains the new concept token (det-logo, here) are taken as inputs. After noise is added to a representation of the image, a neural network attempts to predict these corruptions and adjusts the new concept token’s embedding vectors to improve at this task.
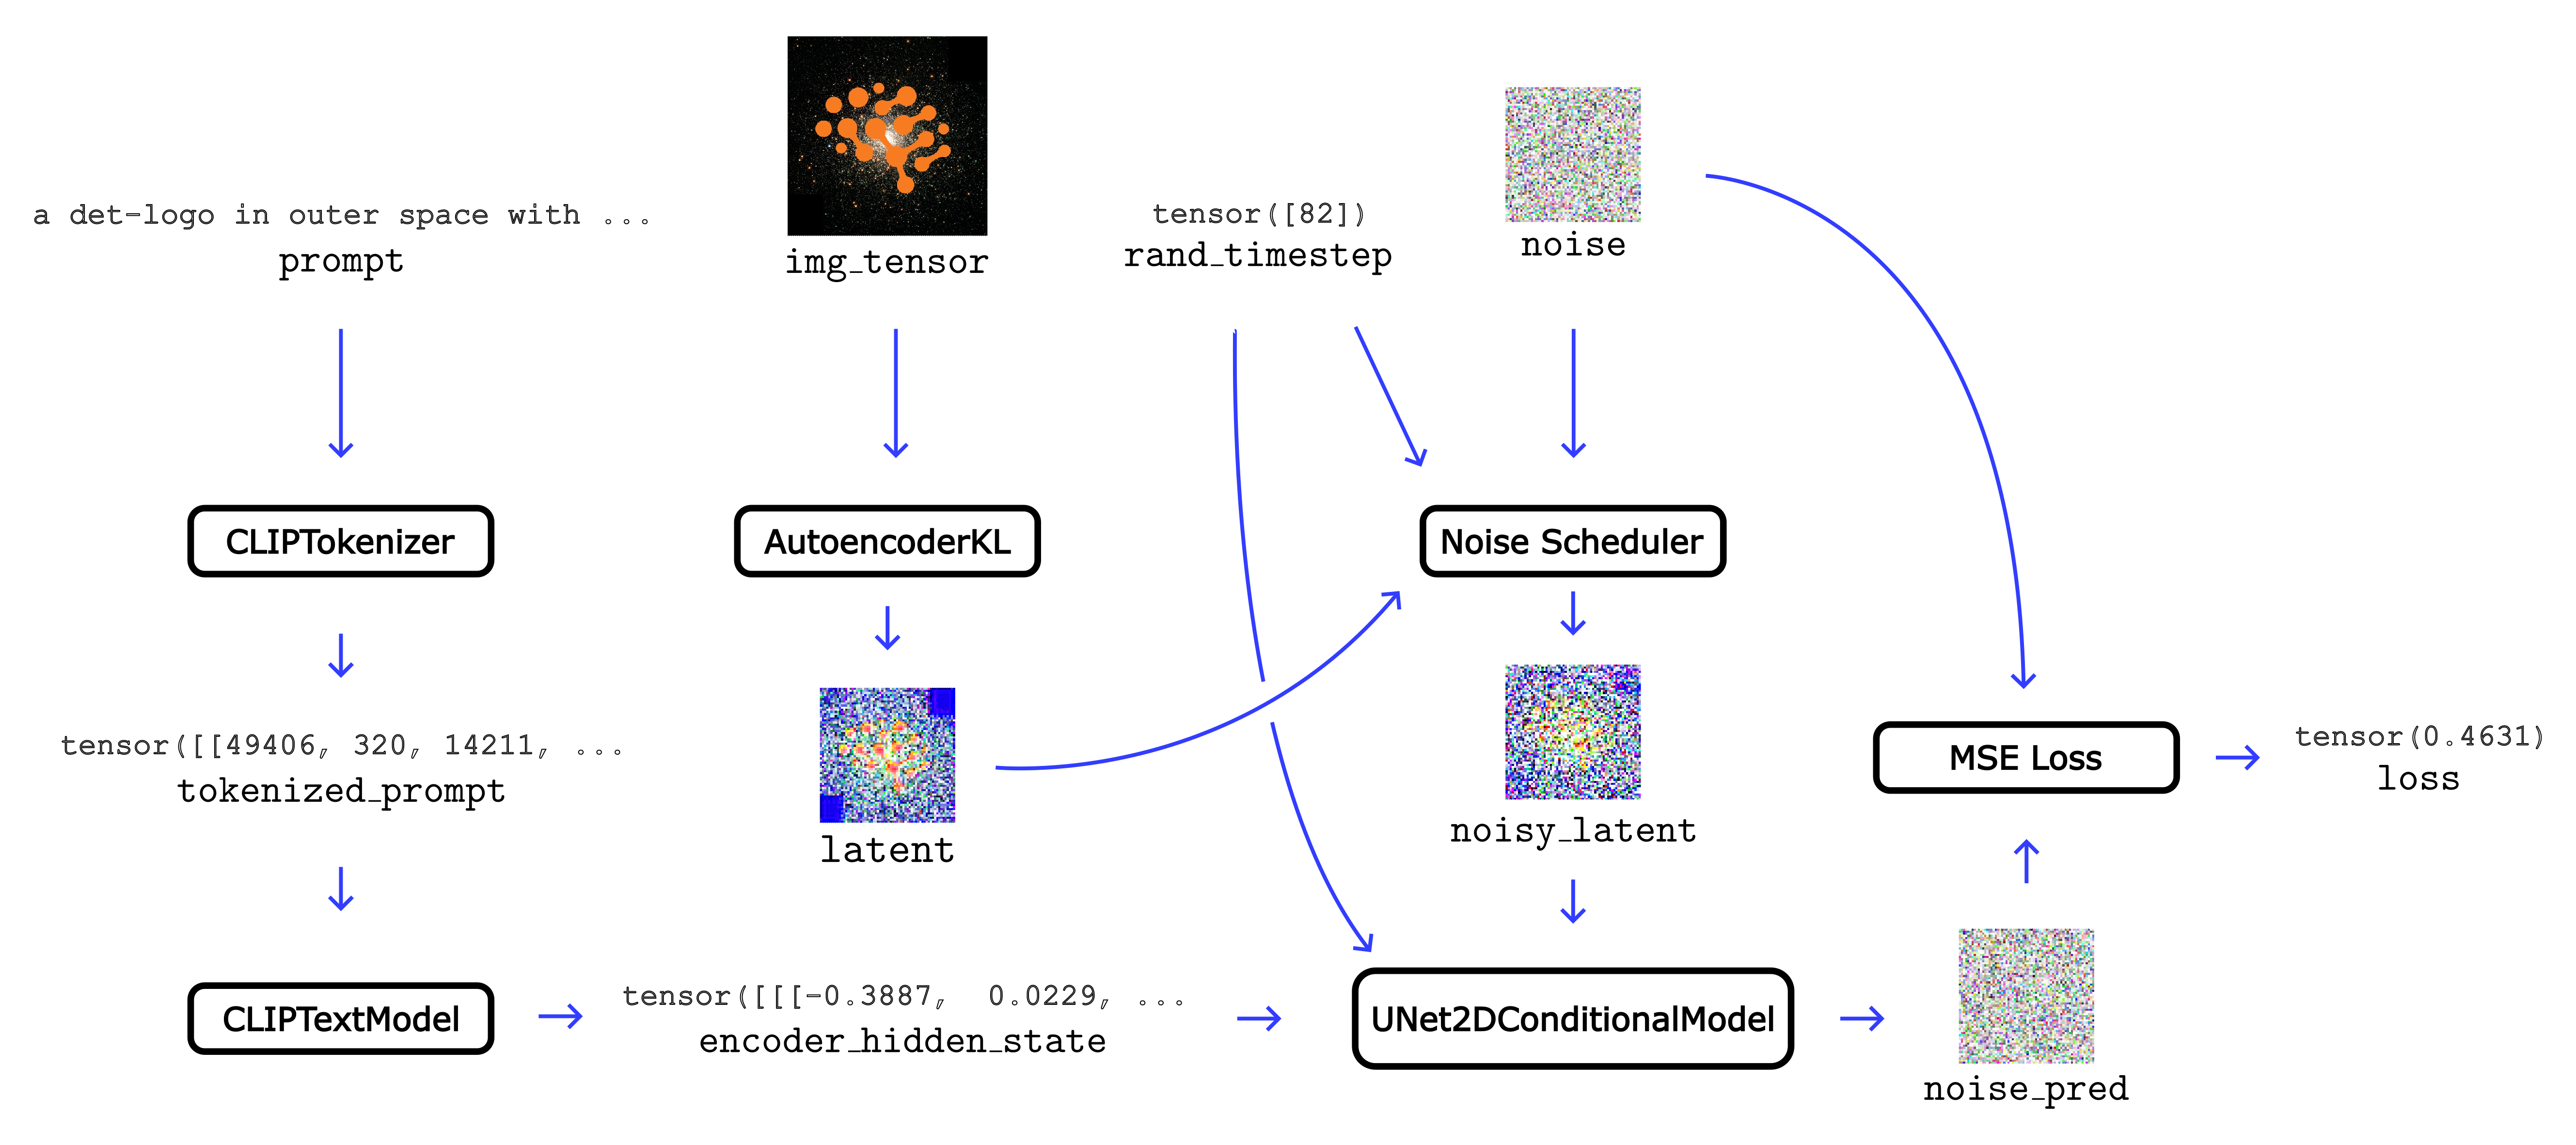
prompt, img_tensor, rand_timestep, and noise at the top are combined into the final loss on the right. The trainable embedding vectors which define the new concept appear in the first layer of the CLIPTextModel block.
A key aspect of Stable Diffusion is that the diffusive process does not actually add the noise to the image pixels directly. Instead, noising and de-noising occur entirely in latent space, a far smaller space to which the images are mapped. It is this compression which ultimately allows the model to be run on the types of GPUs which are available to the typical user.
Training images are transformed into latent space through a neural network, specifically a pre-trained Variational Autoencoder (VAE), AutoencoderKL. Given an un-noised image represented as a tensor img_tensor, the latent-space representation (latent) is constructed as in
latent = vae.encode(img_tensor).latent_dist.sample()
The latent_dist.sample() suffix corresponds to the fact that VAEs are probabalistic models which generate an encoding by drawing a sample from a distribution.
The code above, and in the following, is schematic; precise expressions can be found here.
We then create a noised version of the latent-space representation (noisy_latent) by generating the cumulative noise appropriate for a randomly-chosen step in the forward-process time-series and adding it to the above:
noise = torch.randn(latent.shape)

rand_timestep = torch.randint(0, 1000)

noisy_latent = train_scheduler.add_noise(latent, noise, rand_timestep)
Here, train_scheduler is one of the many noise-schedulers available from 🧨 Diffusers which specifies the precise steps taken during the forward process.
Next, Textual Inversion attempts to predict the above noise from the noisy_latent and guidance from a prompt involving our newly-added concept. The prediction (noise_pred) is performed using the following elements:
- First,
promptis turned into IDs using a CLIPTokenizer, whose vocabulary has been expanded to include new entries per our new concept. - Next, a CLIPTextModel instance, which forms the
text_encoderof the network, consumes this series of IDs, turns them into embedding vectors, and passes them through a Transformer architecture to produce theencoder_hidden_state. - Finally, a UNet2DConditionalModel consumes the
noisy_latent, therand_timestep(in order to know where in the de-noising process we stand), and the outputs from thetext_encoderabove to predict the originalnoisewe started with above.
The above description corresponds to the following (again, schematic) code:
tokenized_prompt = tokenizer(prompt)

encoder_hidden_state = text_encoder(tokenized_prompt).last_hidden_state

noise_pred = unet(noisy_latent, rand_timestep, encoder_hidden_state)
The quality of the prediction is evaluated using the mean-squared-error between the actual and predicted noise
loss = mse_loss(noise, noise_pred)
In Textual Inversion we minimize this loss by adjusting the embedding vectors which represent our new concepts which have been added to the text_encoder above.
The code referenced above uses only vanilla PyTorch and 🧨 Diffusers (the latter also depending on 🤗 Transformers). 🚀 Accelerate and Core API come together only in the scaffolding of the training loop.. Core API is flexible enough to support whichever workflow you prefer. (For additional examples of how to use Core API, see this blog post.)
guidance_scale = 12.877418873468368, num_inference_steps = 62, seed = 199598435
Final Tips
As with Stable Diffusion, a careful balancing act is often required to get satisfactory results from Textual Inversion. Some general tips:
- The original Textual Inversion paper suggests using only 3-5 images for fine-tuning. We have found that the results improve with more images, though the optimal number is still unclear.
- Extensive Textual Inversion fine-tuning can result in incredibly accurate representations of a given concept, but it may come at the cost of diminished diversity in the corresponding generated images. This effect can sometimes be mitigated by using a relatively low
guidance_scale, say around3. - Prompt-engineering is crucial. Prompts found on Lexica.art, for instance, will often provide good starting points. If a particular word is overly-represented in the art, move it later in the sentence; Stable Diffusion pays far more attention to words near the start of the prompt.
- After finding a prompt and parameter settings which generate a decent image, a very good image can often be found by performing a small hyperparameter search in the surrounding neighborhood. Performing such a search is quick and easy with Determined AI.
More advanced tips and discussion can be found in the repo’s README.
An incredible number of resources for Stable Diffusion and Textual Inversion can be found elsewhere online, for instance via r/StableDiffusion or the official Stable Diffusion Discord Server (whose #community-research channel is particularly inventive and which inspired some of the tricks used in the repo).
We look forward to seeing the art you generate with Stable Diffusion and Determined, and to the creative ways you incorporate Core API into your workflow. To share examples with us, reach out to @GGDeterminedAI! And thank you once again to 🤗 Hugging Face for the community GPU grant which supports the interactive demo above.
If you’re just getting started with Determined, refer to our Documentation and visit our GitHub page. For support and to learn more, please join our Determined Slack Community – we’d love to hear from you!
If you enjoyed this blog post, we hosted a lunch-and-learn event a few weeks ago that displayed our Core API feature and more Stable Diffusion training on Determined! If you missed the session, you can check out the event replay on our YouTube channel and sign up for future Determined events on our Meetup page.