SEP 11, 2024
Intro to Core API: Part 2 (Training a Model on MNIST)

February 13, 2023
In Part 1 of our Core API Tutorial series, we learned how to use Core API using a simple integer incrementing example. Here, we’ll show you how to do all the same steps (metric reporting, checkpointing, adaptive hyperparameter search, and distributed training), but instead we’ll use the PyTorch MNIST example. This is the same one used in our Determined PyTorch MNIST Tutorial, which uses one of our Trial APIs (PyTorch API). If you’re curious about the differences between Core API and our Trial APIs, going through both tutorials is a great way to learn!
All the files you’ll need are located here.
Important!
Similar to Part 1, each script builds upon the previous script, and new additions in each .py file are denoted with a #NEW comment explaining the addition.
If you are not familiar with Determined, we recommend reading Intro to Determined first, followed by optional Intro to Core API Part 1: Integer Incrementing. Pause here and make sure you have Determined installed, a cluster deployed, and a basic understanding of Determined (config files, command line interface, and WebUI) to follow along.
Let’s get started!
Step 0: Run the script on your local machine
First, make sure the script model_def.py runs on your machine. This is the same script as main.py in the PyTorch MNIST example, renamed here for consistency.
Tip: Set the --no_mps flag according to your system (False for Macintosh users, True for Windows users).
Now you are ready to start porting.
Step 1: Run the script on Determined
As always, we’ll start with a config file. In this section we’ll be working with const.yaml and model_def.py.
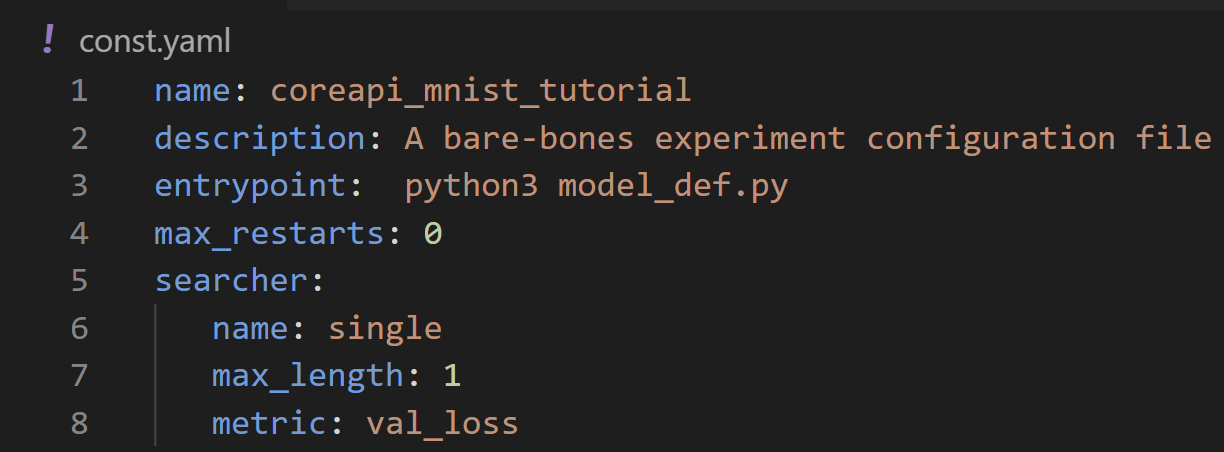
As explained in part 1, this is the bare minimum configuration needed to run a script on Determined, including experiment name, entrypoint, max_restarts, and the default values for searcher.
Now we are ready to send the experiment to master via the command line:
Run the experiment in the WebUI using the command:
det e create const.yaml . -f
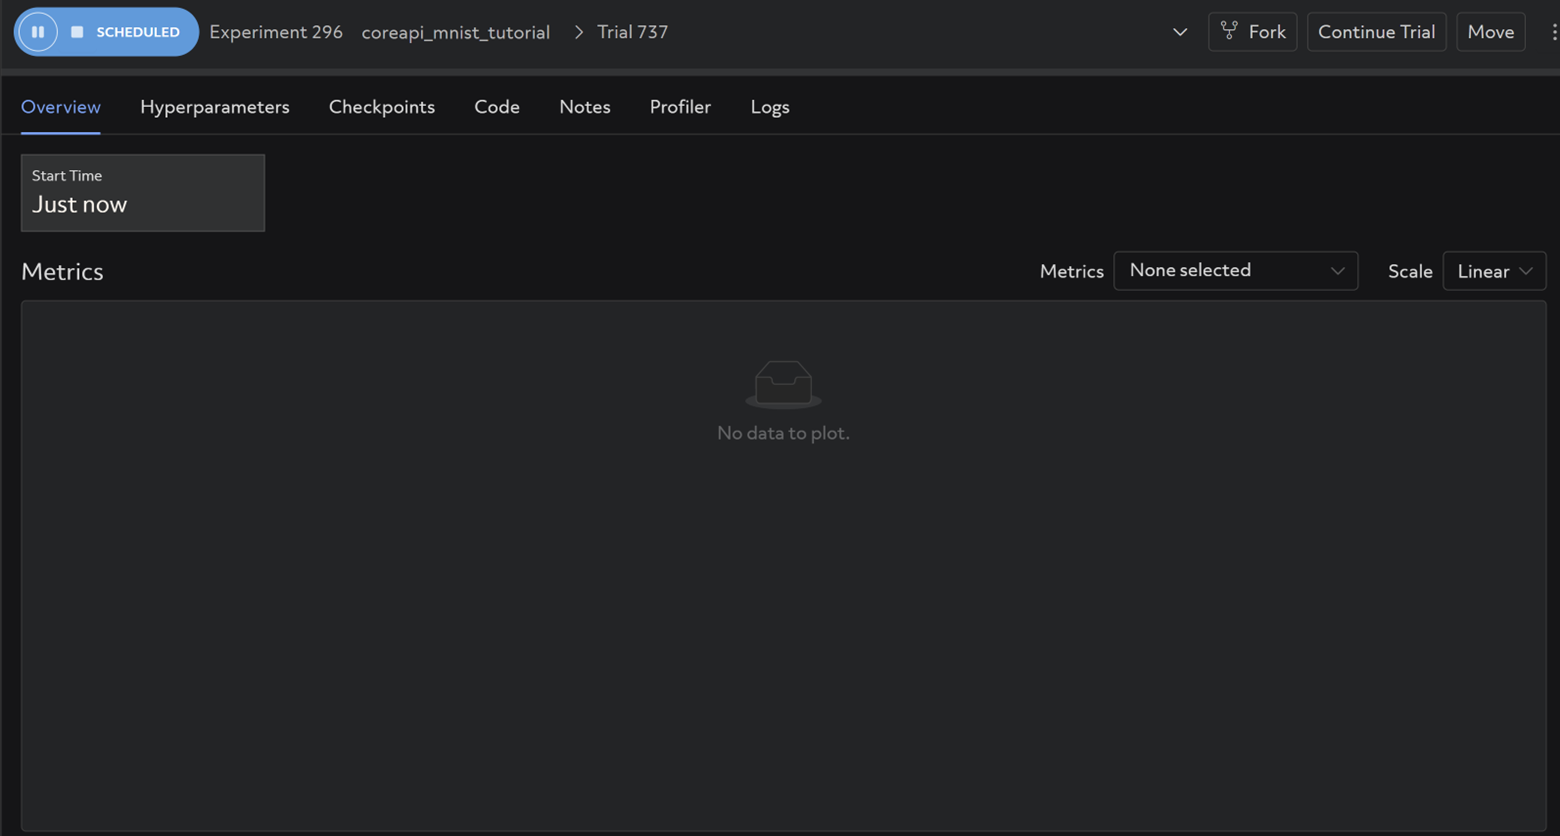
Navigate to your WebUI at <DET_MASTER>:8080 and click on the experiment you just submitted. It should look like the following:
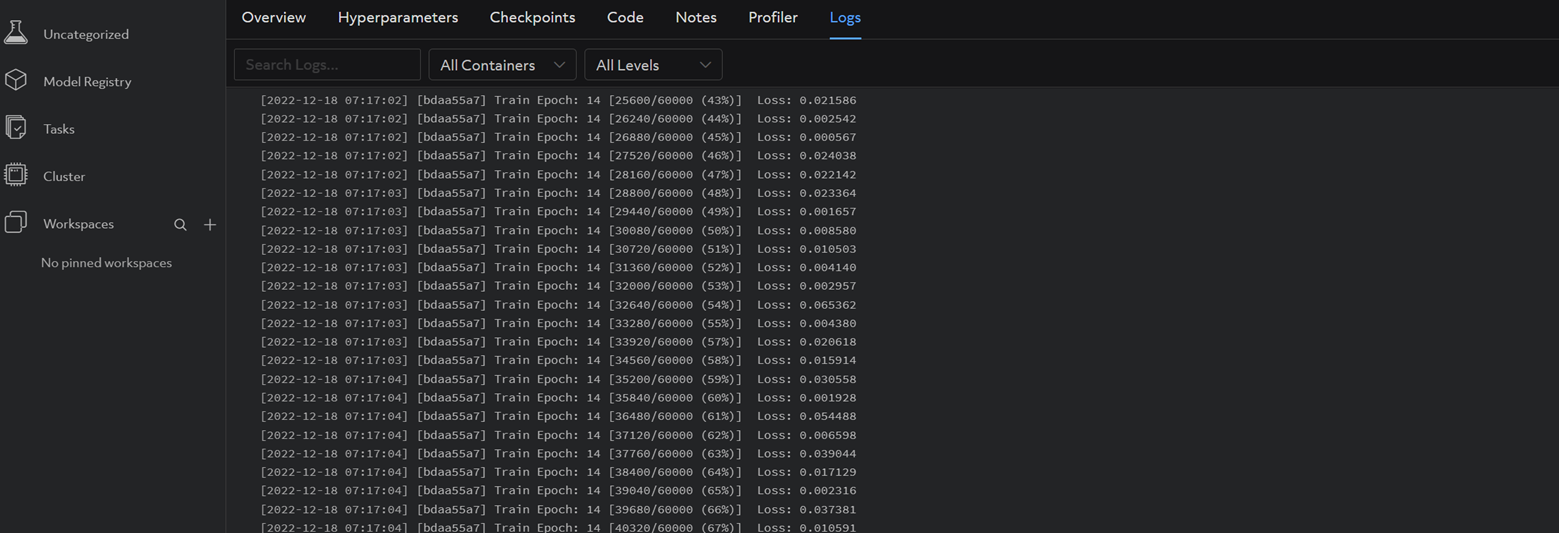
And the same logs you observed in your terminal when running the script locally should be visible under the Logs tab (it may take a couple minutes):
Now this experiment is successfully running on Determined. On to metric reporting!
Step 2: Metric Reporting
In this step we’ll be working with metrics.yaml and model_def_metrics.py.
The first thing we’ll need to do is import Determined:
import determined as det
model_def_metrics.py
We’ll need a core.Context object to be able to interact with the master. Once created, our core_context is passed as an argument into main(), train(), and test(), and function headers are modified accordingly.
if __name__ == "__main__":

    # NEW: Establish new determined.core.Context and pass to main function
    with det.core.init() as core_context:
        main(core_context=core_context)
model_def_metrics.py
Now we’ll define a steps_completed variable that will be used to plot metrics on a graph in the WebUI.
# NEW: Calculate steps_completed for plotting test metrics.
steps_completed = epoch * len(train_loader)
model_def_metrics.py
You will also need to modify the test() function header to include args and a few other items you’ll need during the evaluation loop, as well as pass the newly created core_context into both train() and test():
# NEW: Pass core_context into train() and test().
train(args, model, device, train_loader, optimizer, epoch, core_context)

# NEW: Pass args, test_loader, epoch, and steps_completed into test().
test(args, model, device, test_loader, epoch, core_context, steps_completed=steps_completed)
model_def_metrics.py
Use core_context.train to report training and validation metrics, e.g.:
# NEW: Report training metrics to Determined master via core_context.
# Index by (batch_idx + 1) * (epoch-1) * len(train_loader) to continuously plot loss on one graph for consecutive epochs.
core_context.train.report_training_metrics(
    steps_completed=(batch_idx + 1) + (epoch - 1) * len(train_loader),
    metrics={"train_loss": loss.item()},
model_def_metrics.py
# NEW: Report validation metrics to Determined master via core_context.
core_context.train.report_validation_metrics(
    steps_completed=steps_completed,
    metrics={"test_loss": test_loss},
)
model_def_metrics.py
Tip: We want metrics to be stitched together in one continuous graph as our experiment progresses. To accomplish this, it is important that the index used for steps_completed is calculated appropriately to avoid re-writing metrics with the same index each time a new epoch begins. Failure to do this would result in a duplicate key error.
After sending the experiment to your Determined master again via
det e create metrics.yaml .
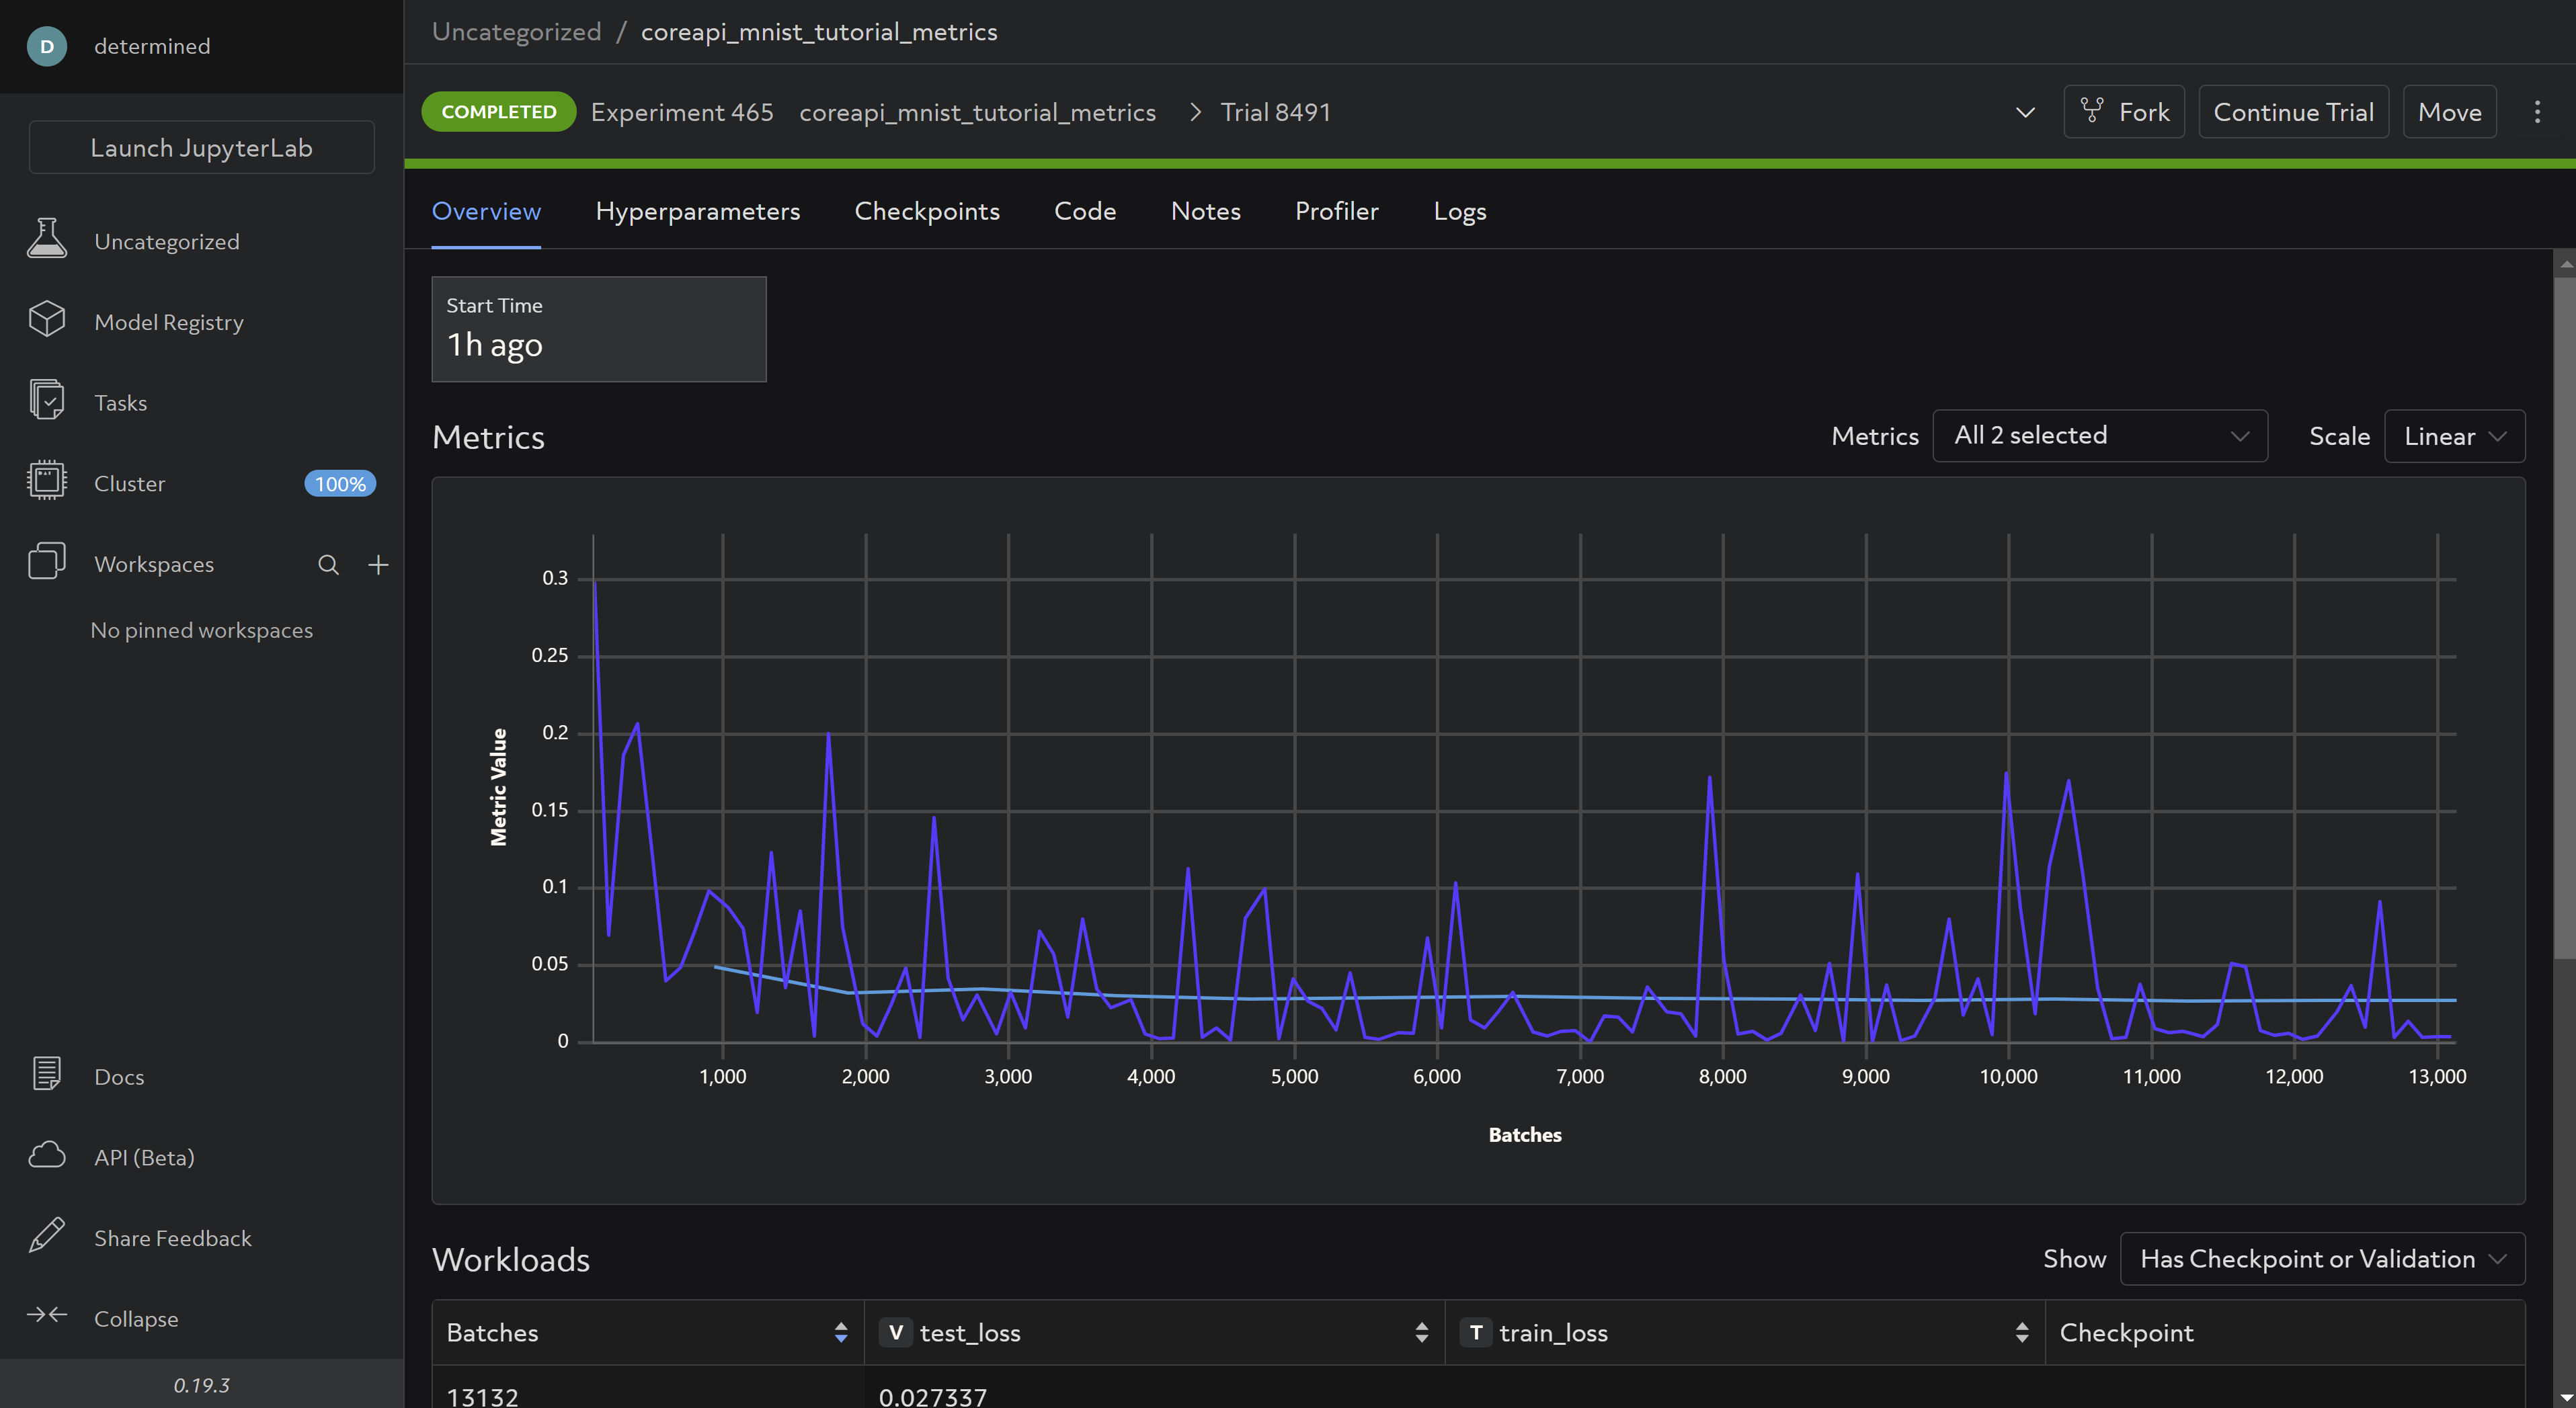
And waiting for the experiment to complete, your WebUI should now look like this:
And the same logs you observed in your terminal when running the script locally should be visible under the Logs tab (it may take a few minutes for the experiment to commence due to dataset extraction):
You can modify args.log_interval to be more or less granular depending on your preference.
Step 3: Checkpointing
In this section we’ll be working with checkpoints.yaml and model_def_checkpoints.py.
Saving checkpoints is done via the store_path function:
 # NEW: Save checkpoint.
  checkpoint_metadata_dict = {"steps_completed": steps_completed}

  with core_context.checkpoint.store_path(checkpoint_metadata_dict) as (path, storage_id):
      torch.save(model.state_dict(), path / "checkpoint.pt")
model_def_checkpoints.py
To enable pausing and experiment an experiment, enable preemption:
# NEW: Detect when the experiment is paused by the WebUI.
  if core_context.preempt.should_preempt():
      return
model_def_checkpoints.py
and define a load function:
# NEW: Define load_state function for restarting model training from existing checkpoint.
def load_state(checkpoint_directory):
    checkpoint_directory = pathlib.Path(checkpoint_directory)
    with checkpoint_directory.joinpath("checkpoint.pt").open("rb") as f:
        return torch.load(f)
model_def_checkpoints.py
that is called if a checkpoint exists and restores the model before resuming training:
# NEW: If checkpoint exists, load it and assign it to model state prior to resuming training.
info = det.get_cluster_info()
assert info is not None, "this example only runs on-cluster"
latest_checkpoint = info.latest_checkpoint
if latest_checkpoint is not None:
    with core_context.checkpoint.restore_path(latest_checkpoint) as path:
        model = load_state(path)
model_def_checkpoints.py
Run the experiment:
det e create checkpoints.yaml .
In the WebUI under checkpoints, you should be able to see saved checkpoints:
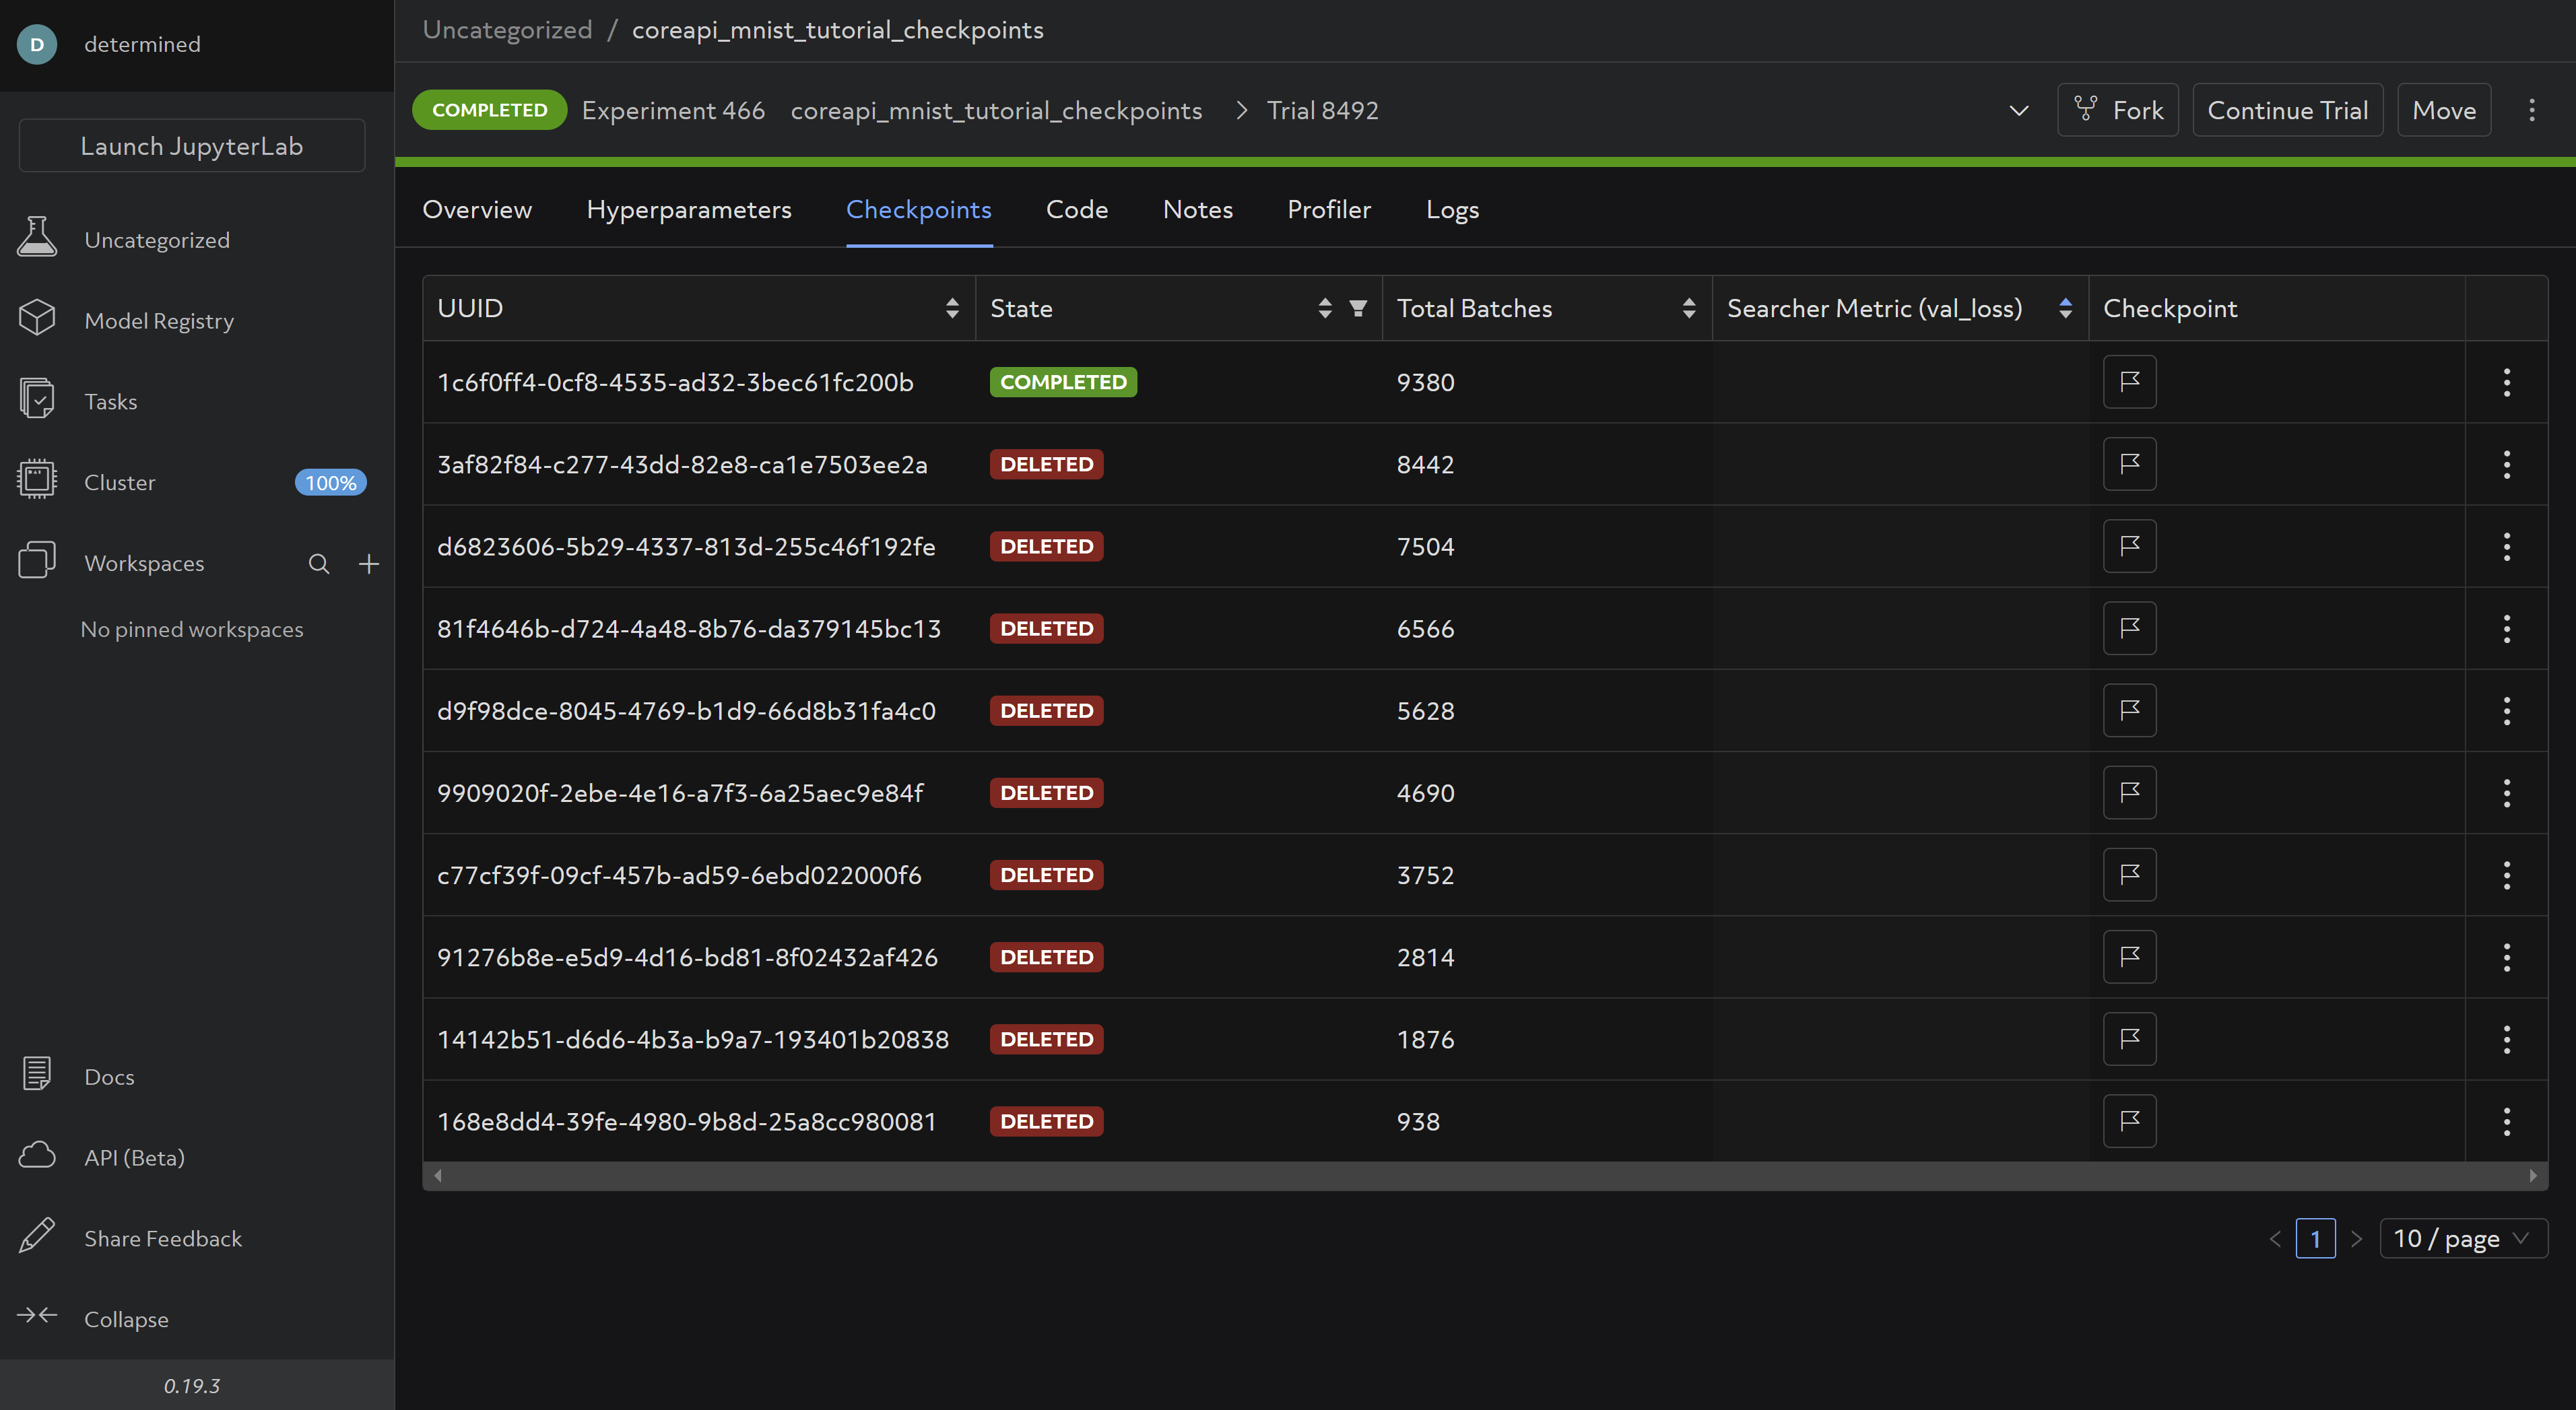
These are saved and deleted according to the default Checkpoint Policy, which you can change in your config file according to your preference.
Step 4: Hyperparameter Search
In this step we’ll be working with model_def_adaptive.py and adaptive.yaml. This time, our configuration file looks different:
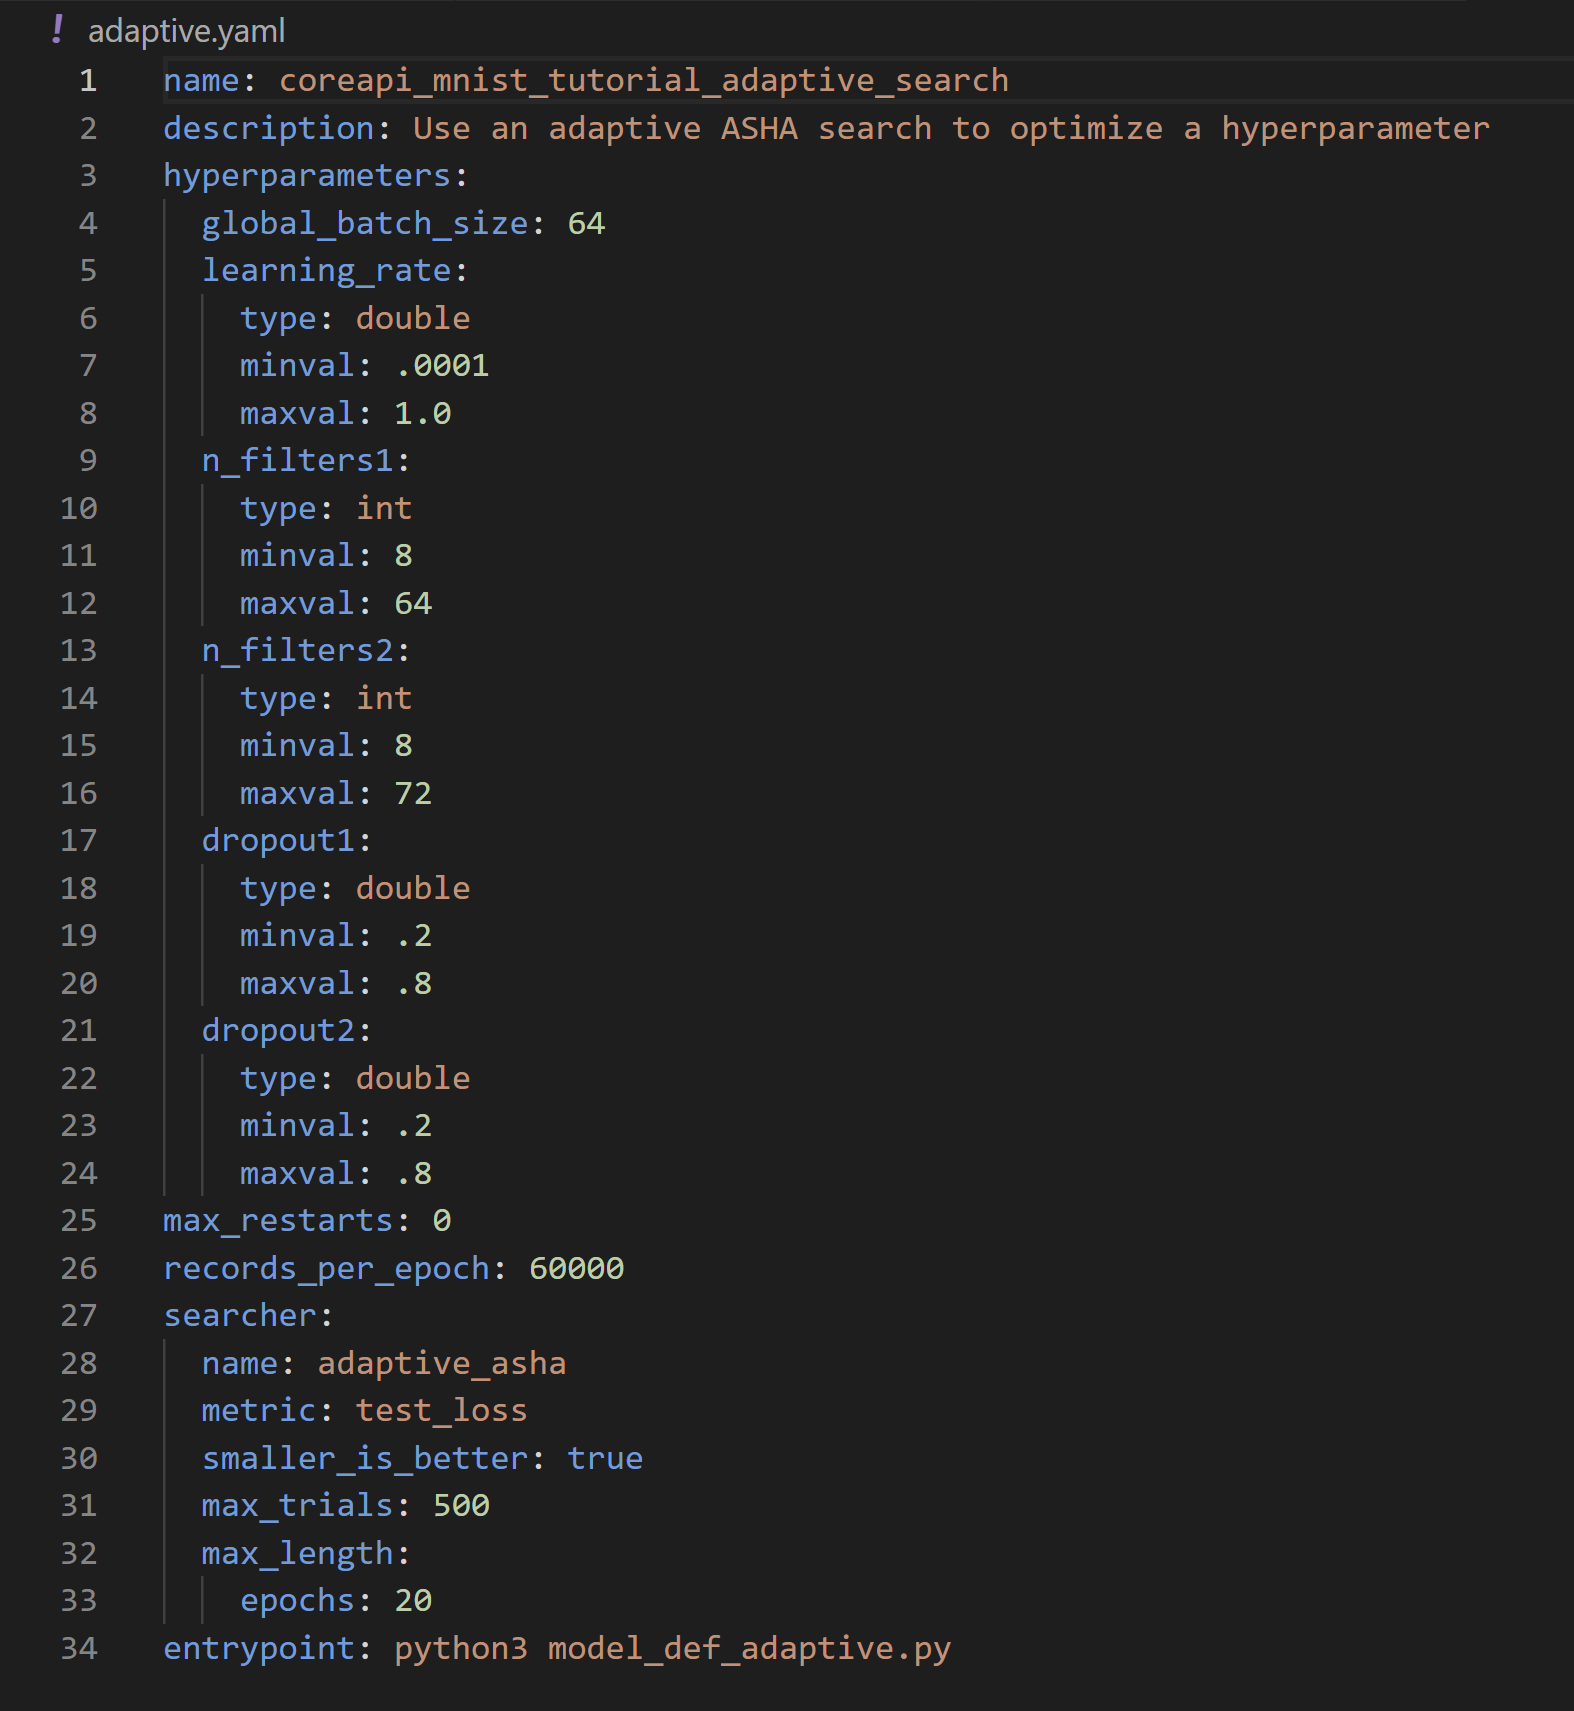
Here we define the hyperparameter search settings we want to use for our experiment:
name:adaptive_asha(name of our searcher. For full options see Search Methods)metric:test_losssmaller_is_better:True(equivalent to minimization vs. maximization of objective)max_trials: 500 (the maximum number of trials the searcher should run).max_length: 20 epochs (The max length of a trial. Full details here)
For more details on Adaptive ASHA, refer to the docs.
We also need to define the hyperparameters themselves. Adaptive ASHA will pick values between the minval and maxval for each hyperparameter for each trial. Try setting max_trials to over 500 and playing around with the hyperparamter search values to see early stopping in action.
To access the hyperparameters in your code, use:
# NEW: Get hparams chosen for this trial from cluster info object.
  hparams = info.trial.hparams
model_def_adaptive.py
Then pass them into your model and optimizer:
# NEW: Pass relevant hparams to model and optimizer.
  model = Net(hparams).to(device)
  optimizer = optim.Adadelta(model.parameters(), lr=hparams["learning_rate"])
And finally, make sure your model the selected values on a per-trial basis rather than your previously hardcoded values:
class Net(nn.Module):
    # NEW: Add hparams to __init__.
    def __init__(self, hparams):
        # NEW: Read hyperparameters provided for this trial.
        super(Net, self).__init__()
        self.conv1 = nn.Conv2d(1, hparams["n_filters1"], 3, 1)
        self.conv2 = nn.Conv2d(hparams["n_filters1"], hparams["n_filters2"], 3, 1)
        self.dropout1 = nn.Dropout(hparams["dropout1"])
        self.dropout2 = nn.Dropout(hparams["dropout2"])
        self.fc1 = nn.Linear(144 * hparams["n_filters2"], 128)
        self.fc2 = nn.Linear(128, 10)
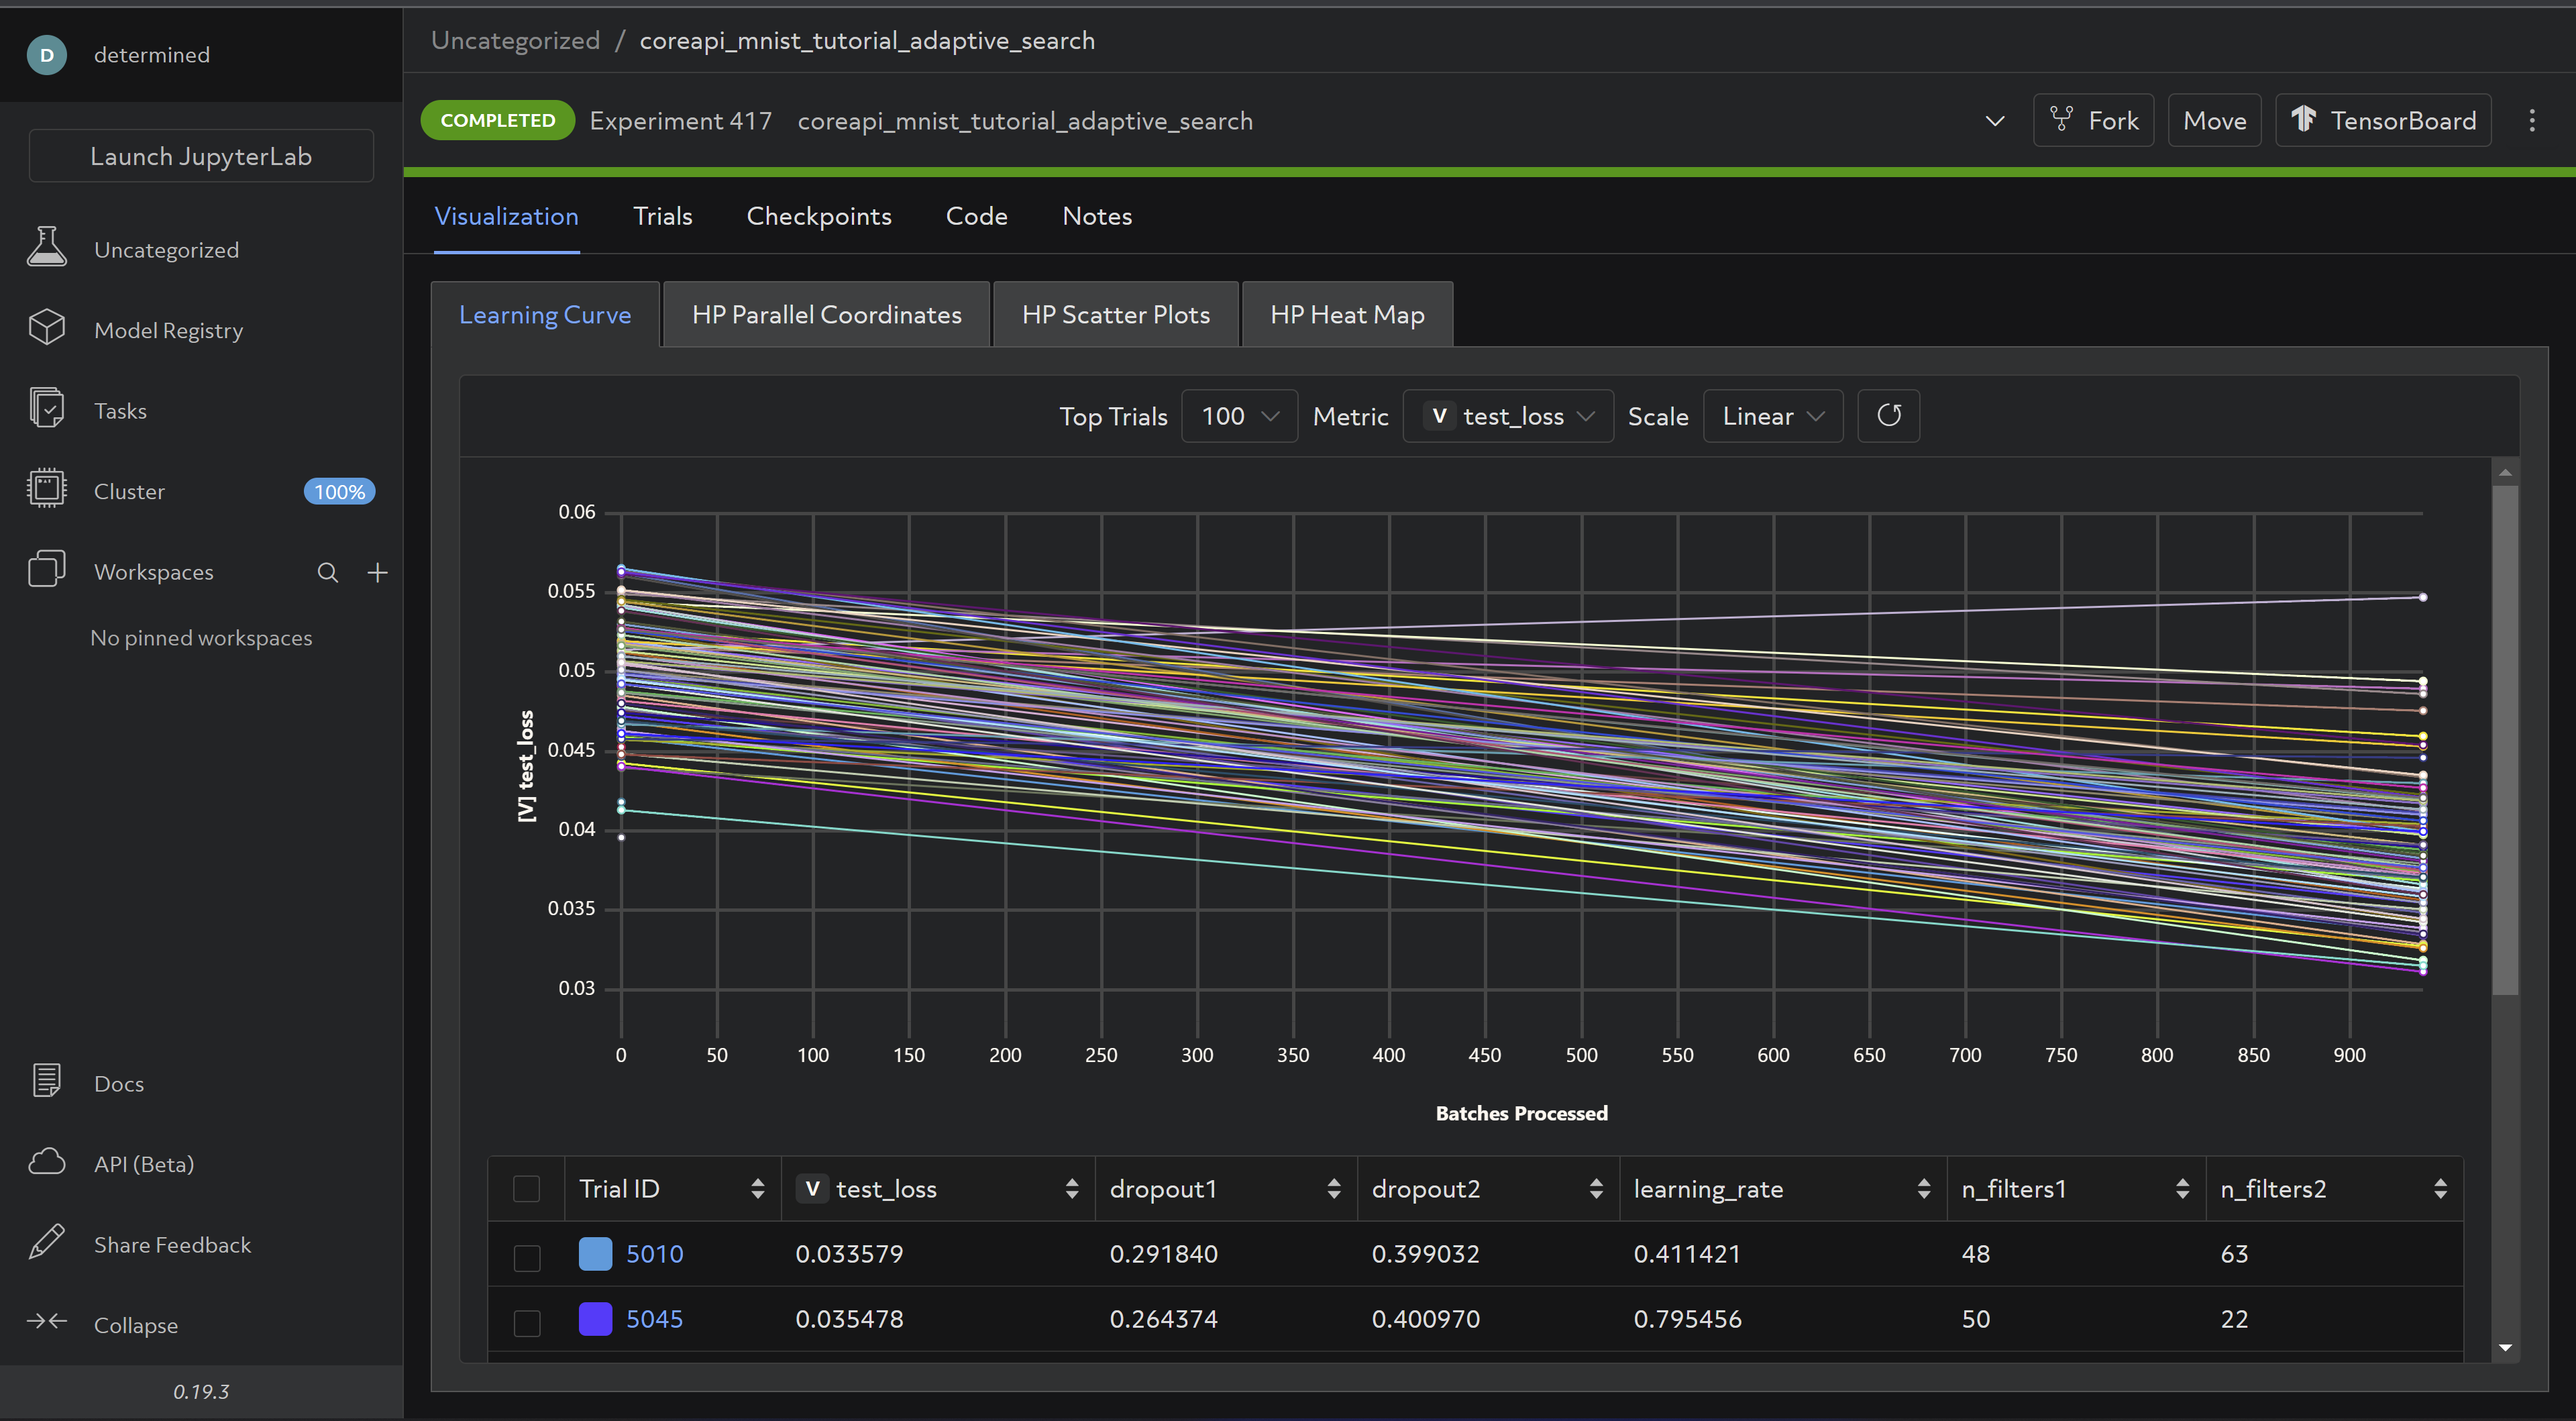
Run the experiment:
det e create adaptive.yaml .
And the completed experiment should look something like this:
Now for the last step - distributed training!
Step 5: Distributed Training
To perform distributed training with the Core API, you’ll need to use the appropriate distributed training library before creating a Determined DistributedContext (here we’ll use torch’s DistributedDataParallel), and make a couple of necessary changes in the configuration file (distributed.yaml).
In distributed.yaml:
1) Pointing to a launch script:
entrypoint: >-
   python3 -m determined.launch.torch_distributed
   python3 model_def_distributed.py
and
2) Under resources, setting slots_per_trial to be the number of GPUs we want to distribute training across:
resources:
  slots_per_trial: 4
In our main script, we’ll need a few more imports:
# NEW: Import torch distributed libraries.
import torch.distributed as dist
from torch.utils.data.distributed import DistributedSampler
from torch.nn.parallel import DistributedDataParallel as DDP
model_def_distributed.py
We first need to initialize a process group and a Determined distributed context using from_torch_distributed:
if __name__ == "__main__":
    # NEW: Initialize process group using torch.
    dist.init_process_group("nccl")

    # NEW: Initialize distributed context using from_torch_distributed
    # (obtains info such as rank, size, etc. from default torch environment variables).
    distributed = det.core.DistributedContext.from_torch_distributed()
    with det.core.init(distributed=distributed) as core_context:
        main(core_context)
model_def_distributed.py
Then in main, set our device to the one on index local_rank (if you only have a 1 GPU-per-node setup, this won’t matter, but it is good practice):
# NEW: Change selected device to the one with index of local_rank.
device = torch.device(core_context.distributed.local_rank)
model_def_distributed.py
We’ll need to shard the data into num_replicas non-overlapping parts (num_replicas is equal to `core_context.distributed.size, or the number of slots)
# NEW: Create DistributedSampler object for sharding data into core_context.distributed.size parts.
sampler1 = DistributedSampler(
    dataset1,
    num_replicas=core_context.distributed.size,
    rank=core_context.distributed.rank,
    shuffle=True,
)
sampler2 = DistributedSampler(
    dataset2,
    num_replicas=core_context.distributed.size,
    rank=core_context.distributed.rank,
    shuffle=True,
)

# NEW: Shard data.
train_loader = torch.utils.data.DataLoader(dataset1, sampler=sampler1, **train_kwargs)
test_loader = torch.utils.data.DataLoader(dataset2, sampler=sampler2, **test_kwargs)
model_def_distributed.py
As well as wrap our model with torch’s DistributedDataParallel:
# NEW: Wrap model with DDP. Aggregates gradients and synchronizes model training across slots.
model = DDP(model, device_ids=[device], output_device=device)
model_def_distributed.py
And finally, at each place in the code where we upload checkpoints, report training metrics, or report progress to the master, we need to make sure this is done only on rank 0, e.g:
# NEW: Report metrics only on rank 0: only the chief worker may report training metrics and progress,
# or upload checkpoints.
if core_context.distributed.rank == 0:
    core_context.train.report_training_metrics(
        steps_completed=(batch_idx + 1) + (epoch - 1) * len(train_loader),
        metrics={"train_loss": loss.item()},
    )
model_def_distributed.py
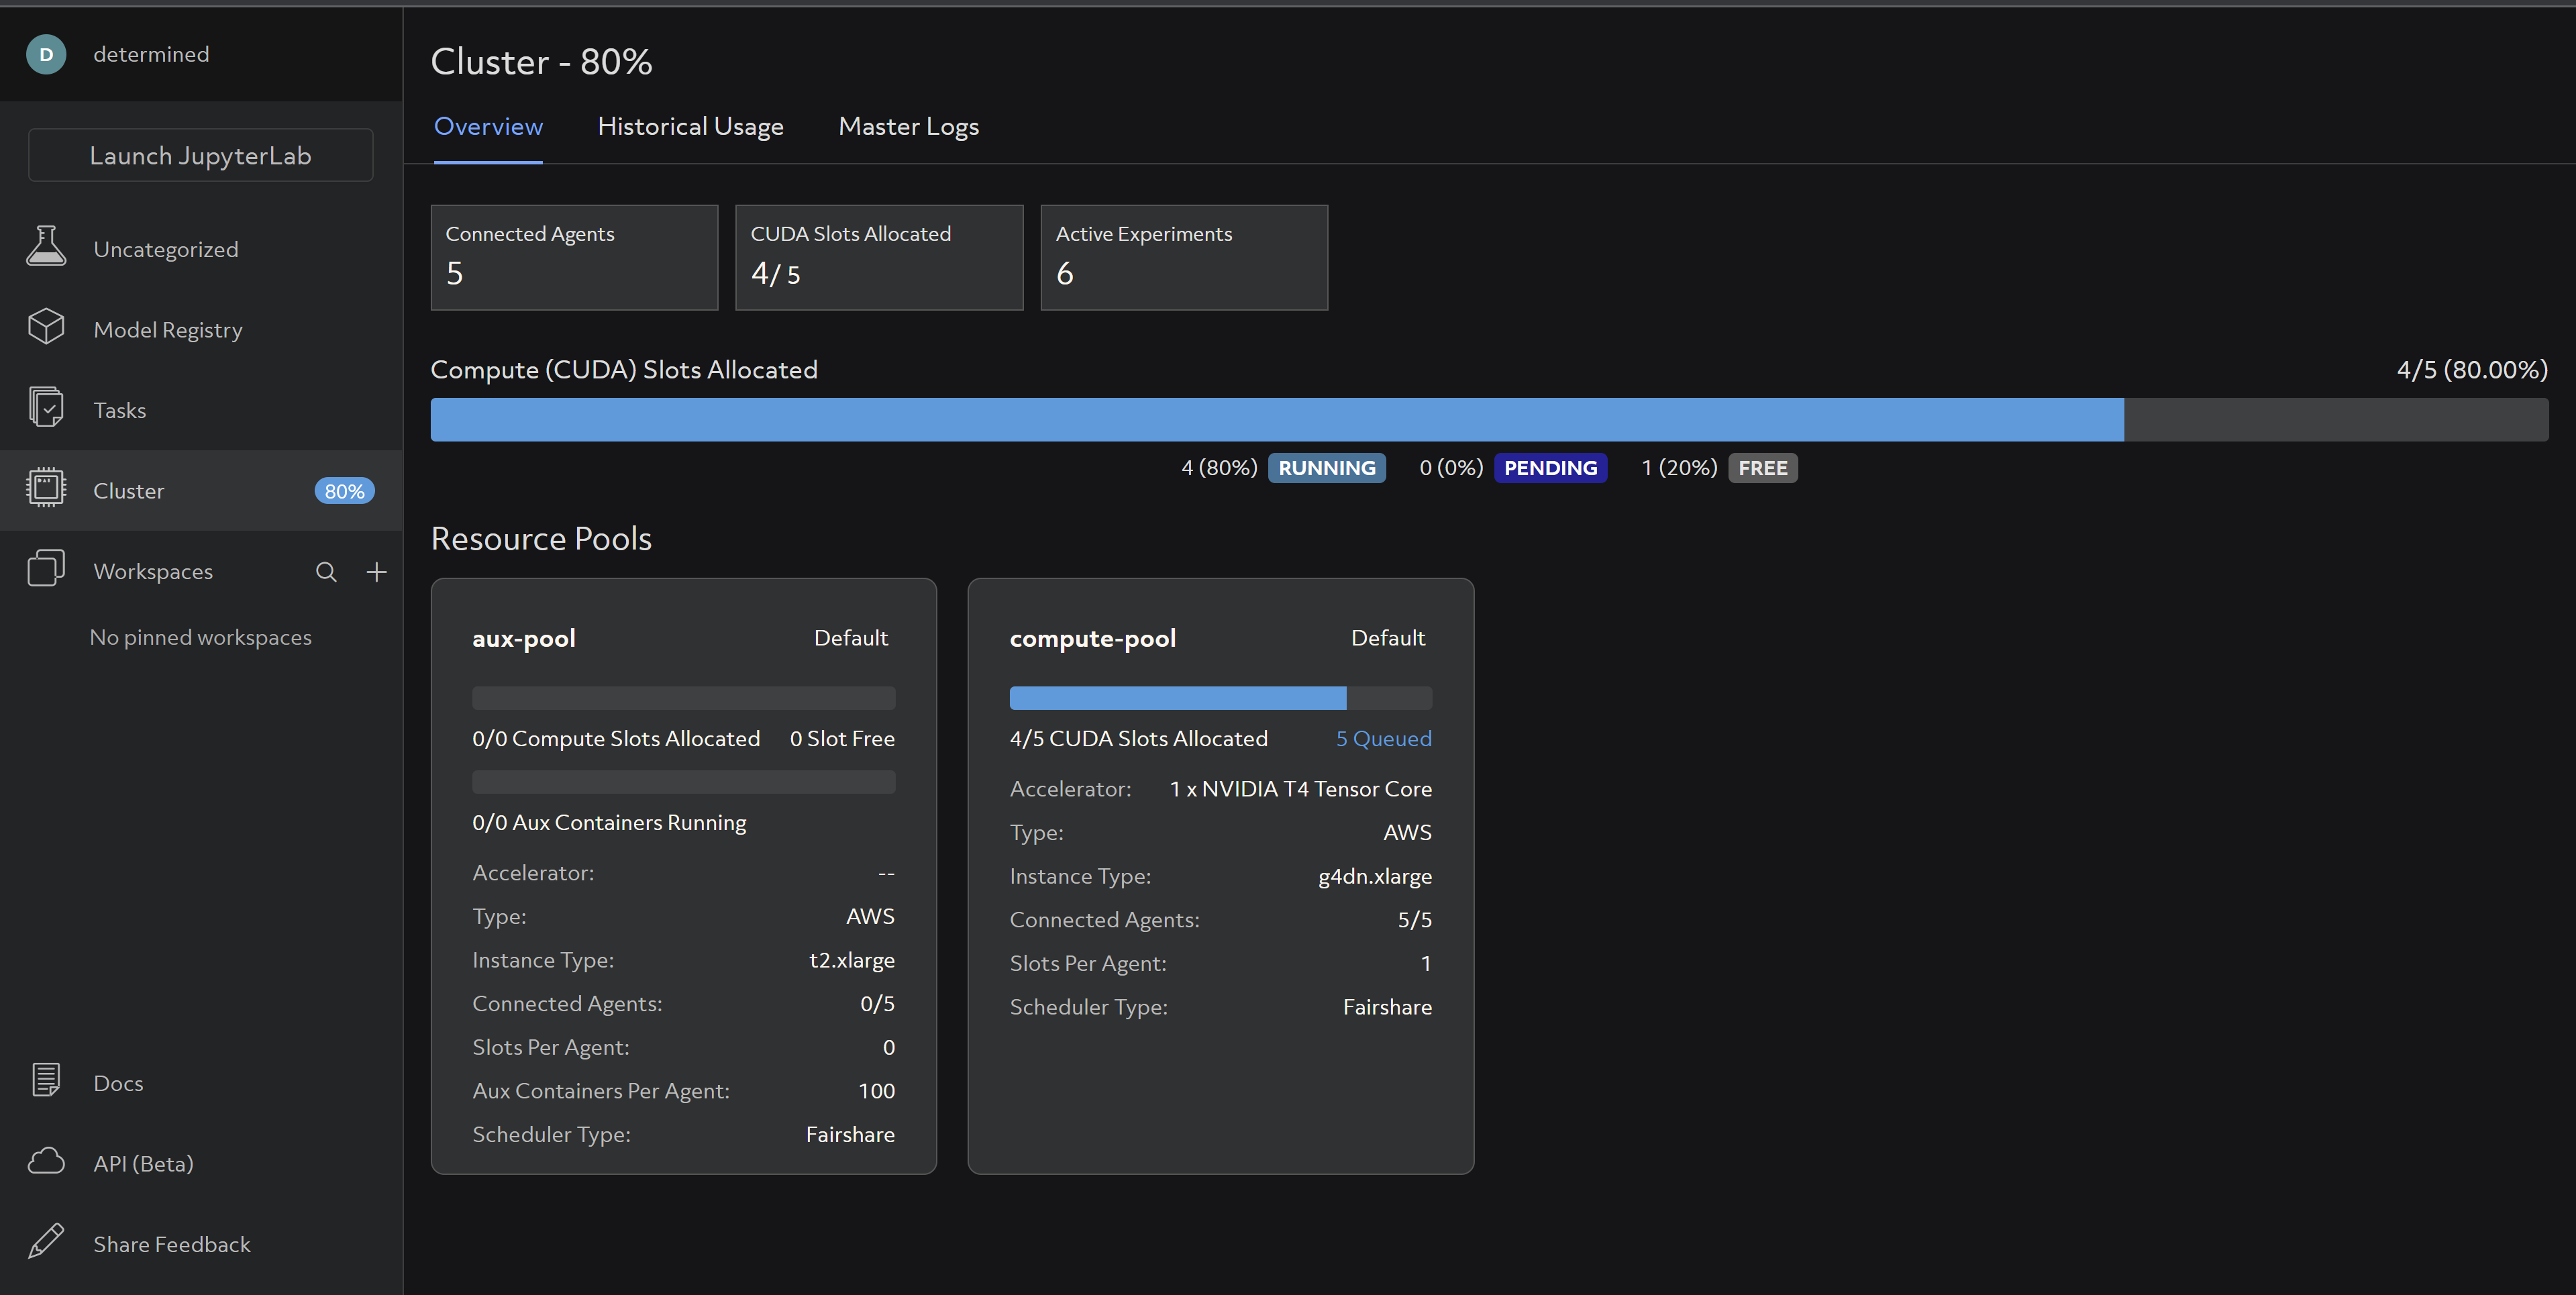
Run the experiment via:
det e create distributed.yaml .
And you should be able to see your cluster resources being utilized accordingly:
For more details on distributed training check out our Intro to Distributed Training docs and Core API specific distributed training docs.
That’s it! If you’ve finished this tutorial, you’re officially a Core API user - congratulations and happy experimenting! Also be sure to connect with us on Slack and stay up to date on our monthly Lunch & Learns and Office Hours.